

How To Make Playing Cards In Photoshop
In this blueprint tutorial y'all will acquire how to blueprint a playing carte du jour with a nautical theme in Photoshop. Nosotros will exist using a lot of vintage elements, textures, and furnishings to create this beautiful and fun pattern!
Take YOU SEEN OUR YOUTUBE Channel?
Picket the video tutorial beneath and subscribe to our YouTube channel for regular updates directly to your inbox.
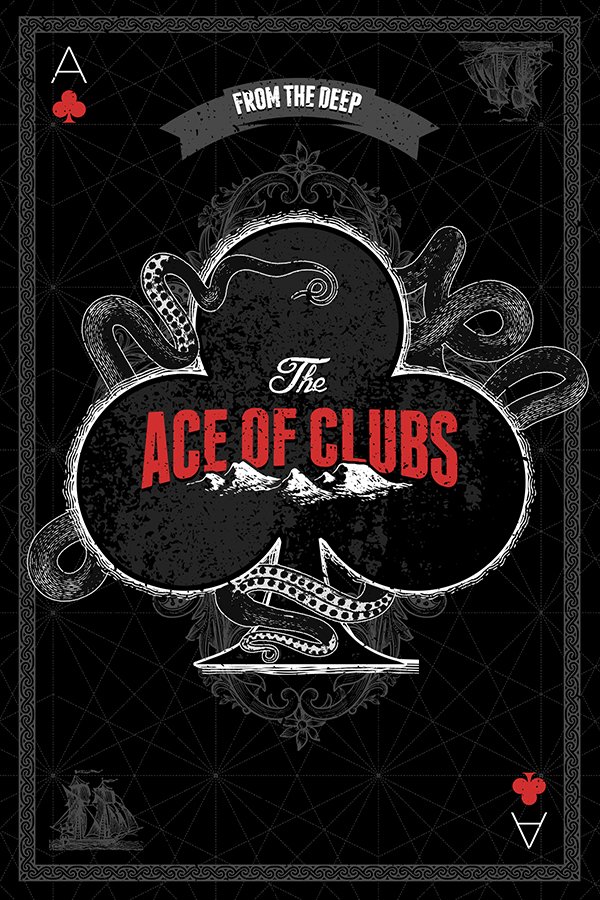
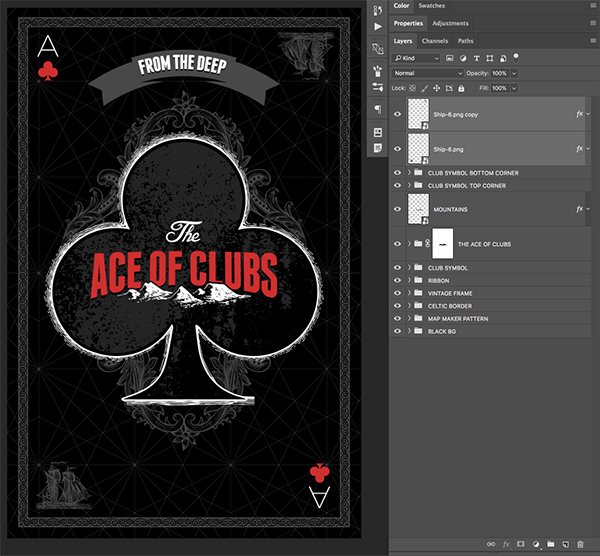
Here's a look at what we'll be creating:
Follow along with this tutorial: Download the freebie files
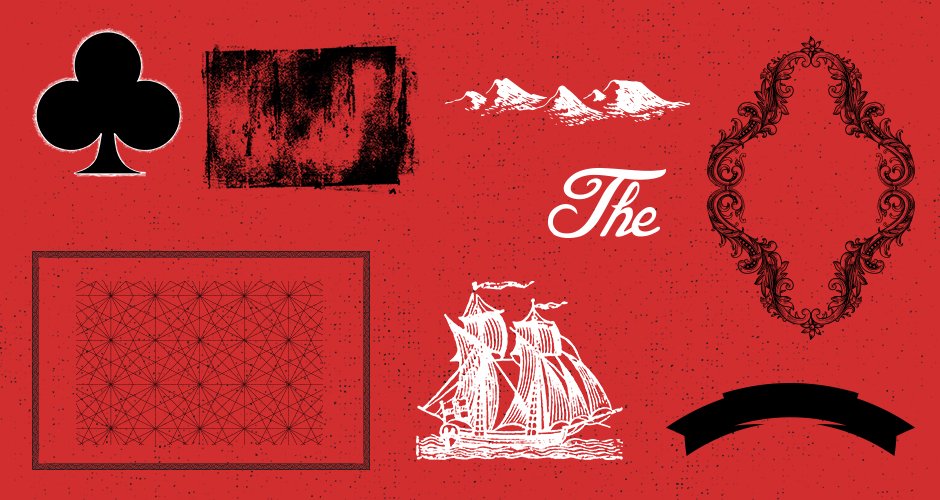
This freebie pack includes samples of some fantastic vector elements including banners, ribbons, and some awesome grunge textures and nautical themed imagery.
The freebie pack is only a pocket-sized sample of what you will find in the The Ultimate Vector Pattern Bundle for just $29! This packet contains a massive drove of incredibly detailed vector design assets. This is an absolute must-have for anybody looking to save hours of work while making your designs look better than ever.
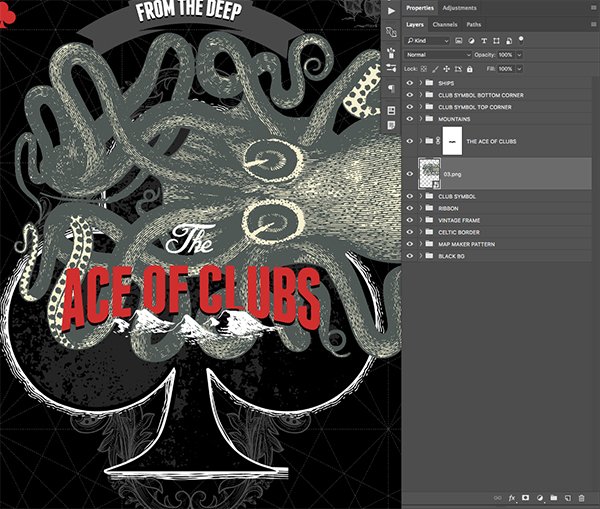
Step 1: From the Deep Playing Cards
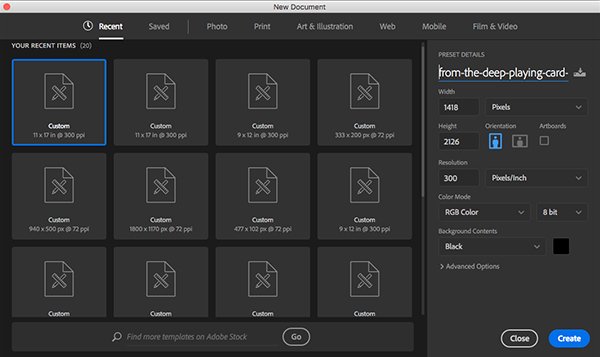
Begin past opening Adobe Photoshop and create a New Document that is 1418 x 2126 pixels with an RGB Colour Mode and a Resolution of 300 ppi. Let's also take a moment to proper name our file – here I will be calling it 'from-the-deep-playing-card-design' merely feel free to call information technology annihilation you would similar. Once yous have set that up get ahead and click on the 'Create' button at the lesser right of the dialog box to make your document.
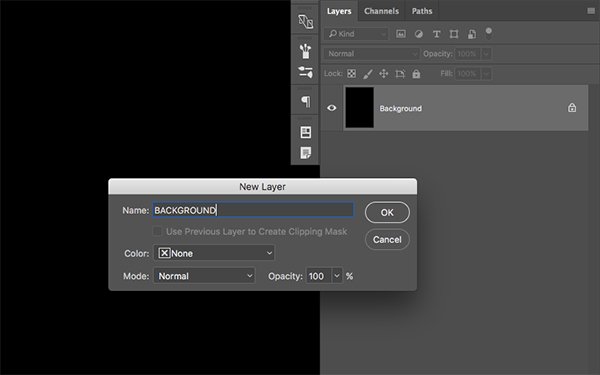
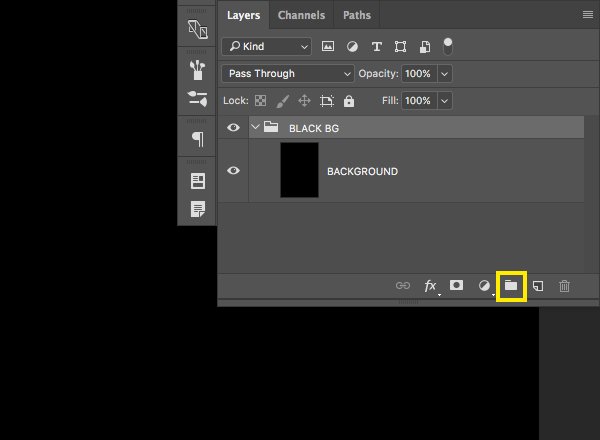
Observe that once your new file has been set up there is only a single 'Background' layer with a pocket-size lock icon next to it. Double click on the layer to unlock it and y'all will exist prompted with a dialog box request you to name your New Layer. Permit'southward call this 'BACKGROUND' in all caps and then hitting 'OK' to use the alter and unlock the layer.
After renaming and unlocking the layer, click on it and and so select the small folder icon at the bottom of the Layers Palette to put the layer into a new Group Binder. Double click on the binder name and change information technology to 'BLACK BG' as shown hither:
Footstep 2: The Grid
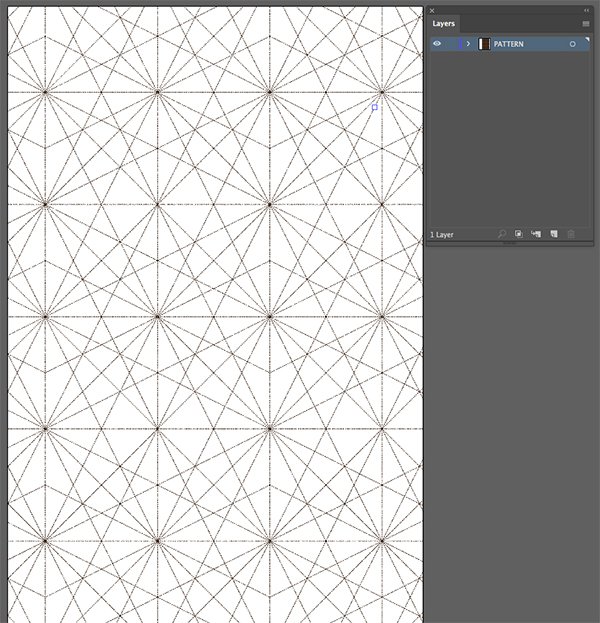
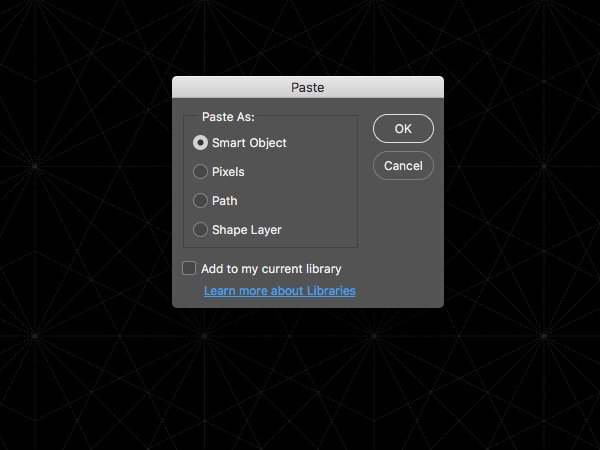
Open up 'Chart_Grid_1.eps' file from the freebies for this tutorial in Adobe Illustrator.
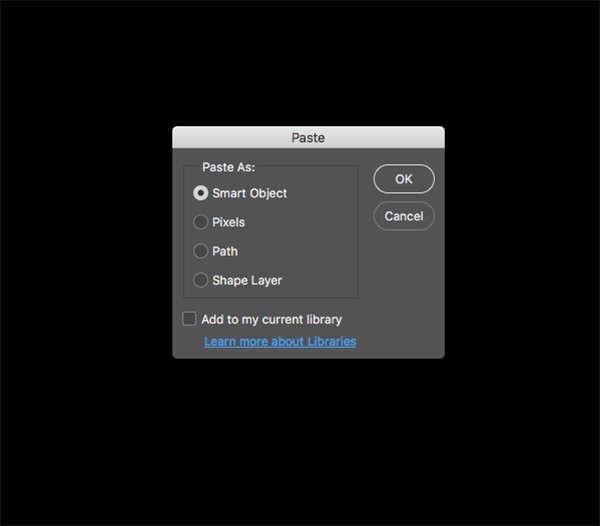
Press Command/Ctrl+A to Select All and then Control/Ctrl+C to copy the pattern. Side by side, render to Photoshop and press Command/Ctrl+V to paste the object. You lot will be prompted with a dialog box request you how you want to paste your object – here we volition cull 'Smart Object' so printing 'OK' as shown beneath:
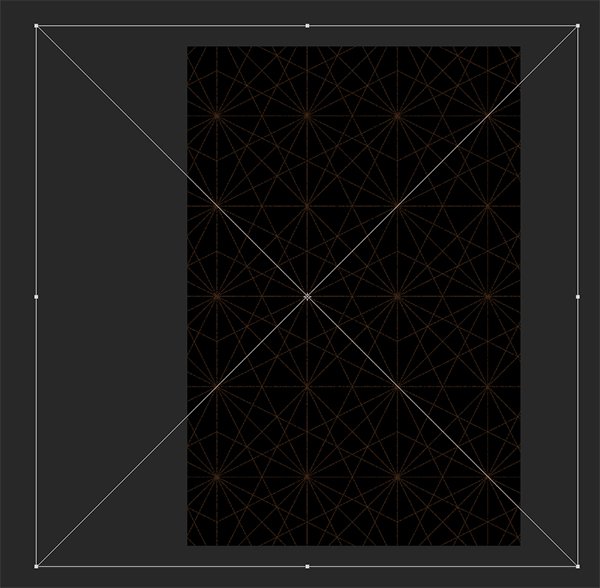
Press Command/Ctrl+T to initiate a Free Transform and then hold the Alt/Option+Shift keys and drag outwards from whatsoever of the 4 corners of the bounding box to calibration it up until information technology covers the unabridged canvass expanse, then press 'Enter' to utilise the transformation.
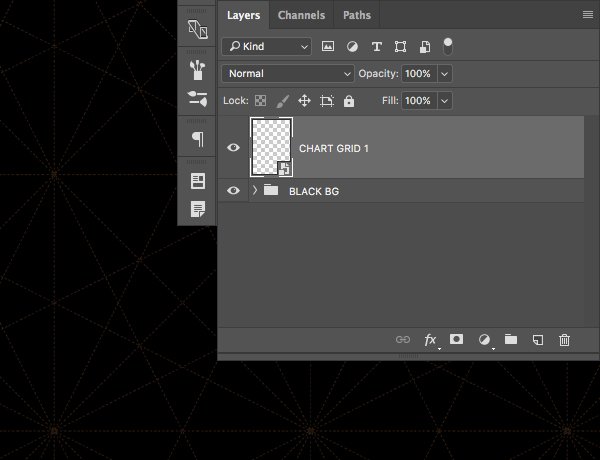
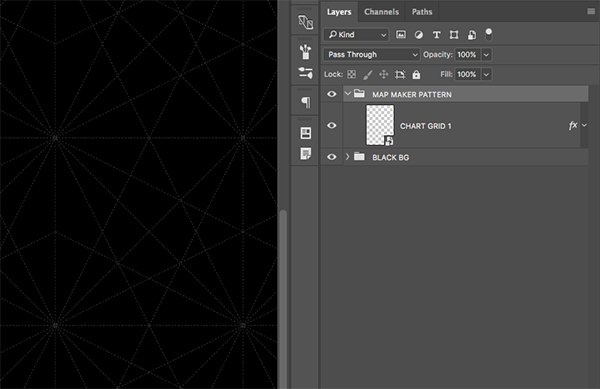
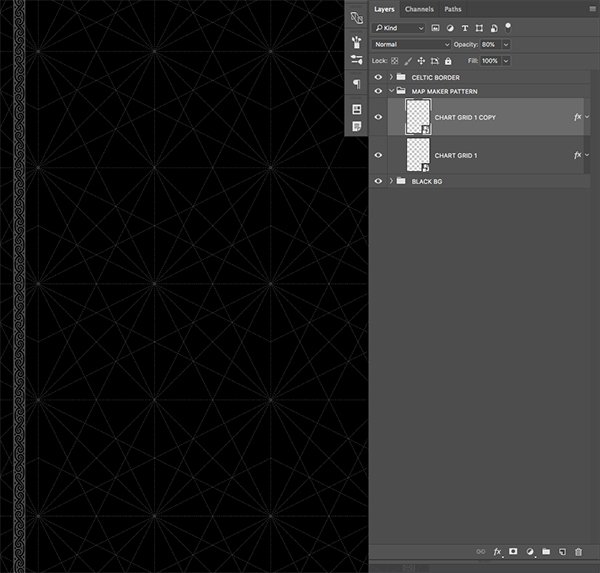
Double click on the layer name and alter it to 'Chart Filigree i' every bit shown here:
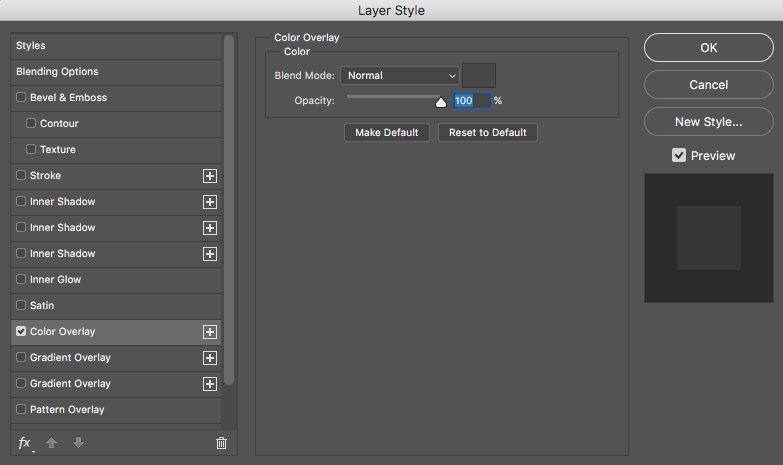
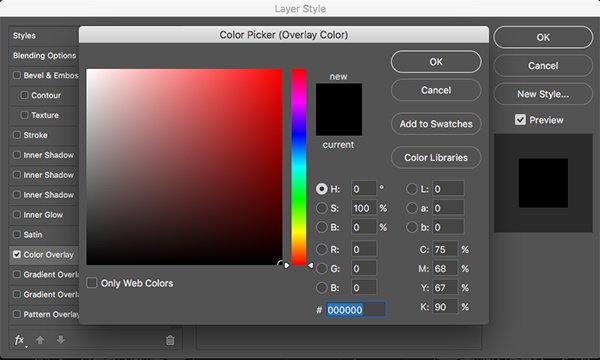
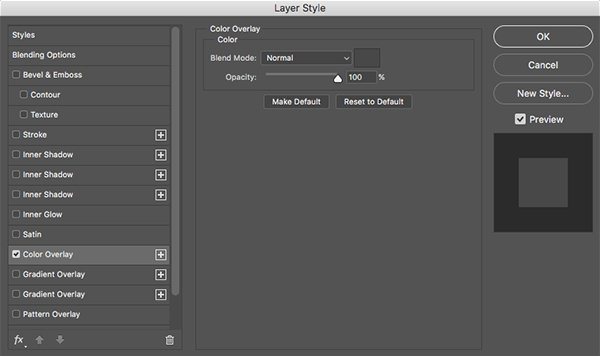
Double click on the layer itself to bring up the Layer Style options and check off 'Color Overlay' from the list to the left.
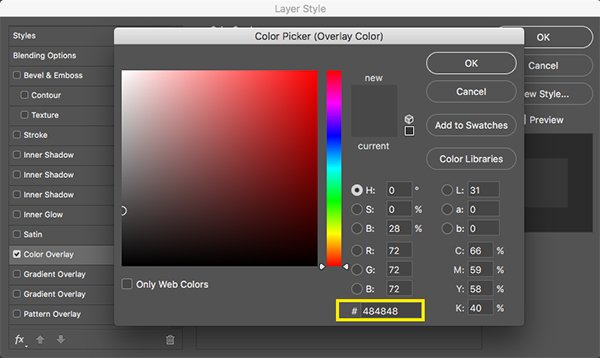
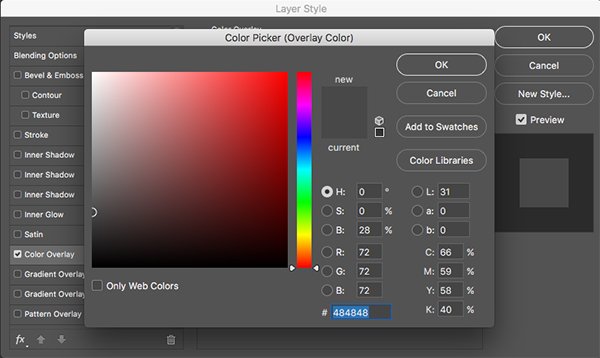
For the fill colour let's enter a hexadecimal value of #484848 equally shown here:
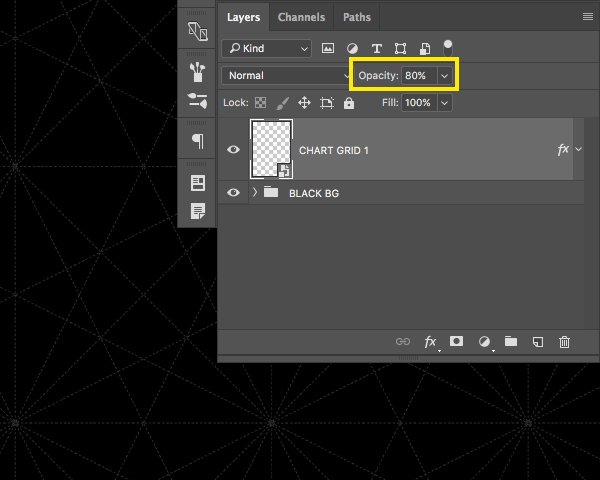
Press the 'Enter' primal twice to utilize the changes and close out of the dialog box. Reduce the opacity of the layer to '80%' by dragging the slider to the left or simply pressing the number '8' on the keyboard.
Select the Smart Object and so click on the pocket-size folder icon at the lesser of the Layers Palette to place it into a new Group Folder. Conversely, you could use the keyboard shortcut Control/Ctrl+G while the layer or layers are selected. Next, double-click on the name of the folder and modify it to 'MAP MAKER PATTERN' as shown below:
Footstep three: Border Patrol
Open 'celtic-design-brush-13.eps' file from the freebie folder.
Select the border, press Command/Ctrl+C to copy it, return to Photoshop, and and so printing Command/Ctrl+V to paste it every bit a Smart Object.
Pace four: Border Patrol
This time when you lot paste your Smart Object it should fit nicely in your document with a bit of room or padding around all of the sides. Double click on the name of your new Smart Object in your Layers Palette and alter it to 'CELTIC Brush BORDER' earlier expanding the 'MAP MAKER PATTERN' folder below by clicking on the pocket-sized pointer icon to the left of the folder.
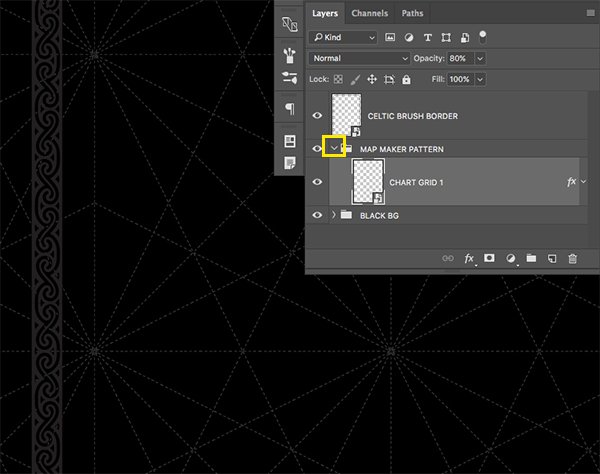
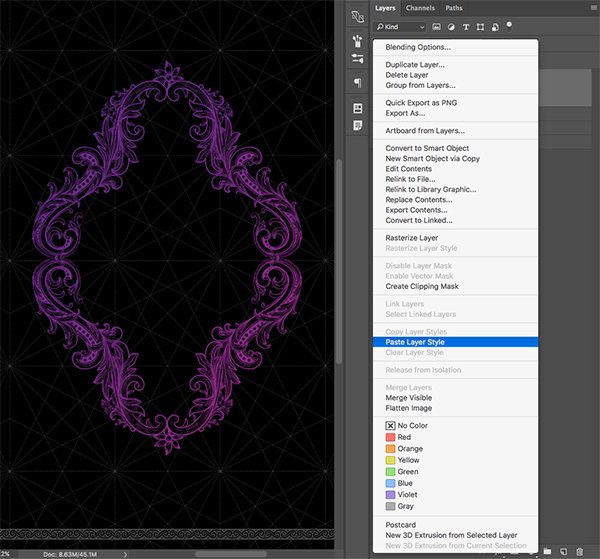
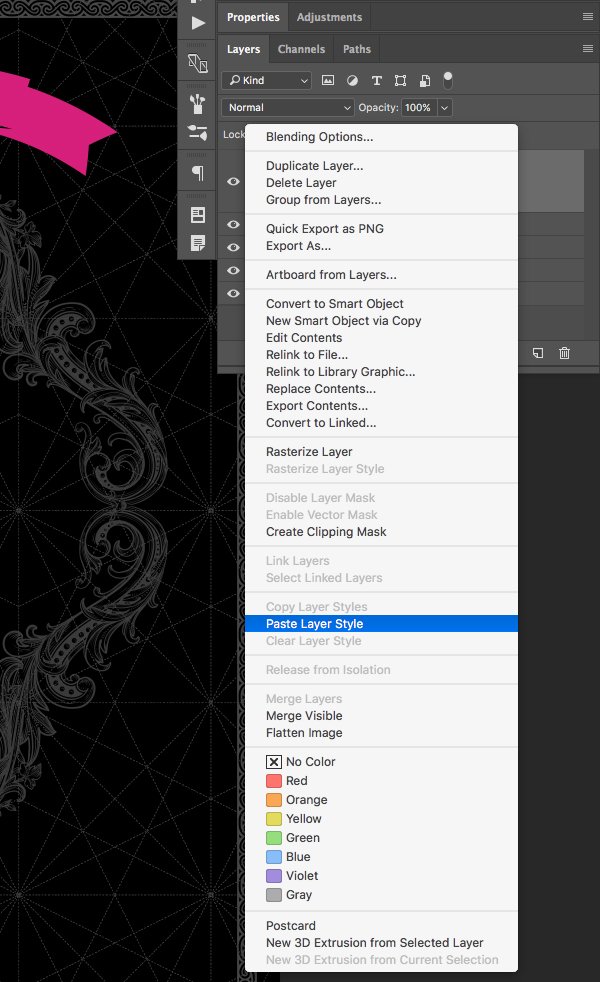
Hold the Control Key and click on the small 'fx' icon next to the 'Nautical chart Grid 1' Smart Object and you lot should and then see a dropdown menu. From the list, choose the option that says 'Copy Layer Styles' equally shown here:
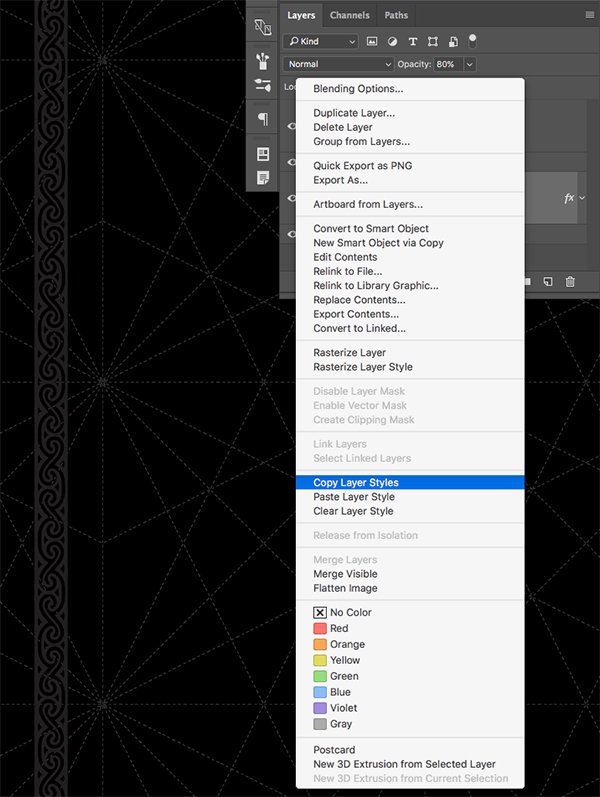
Select the 'CELTIC Castor Border' Smart Object while belongings the Command Key to reveal the dropdown menu over again, and this time choose 'Paste Layer Fashion' from the list.
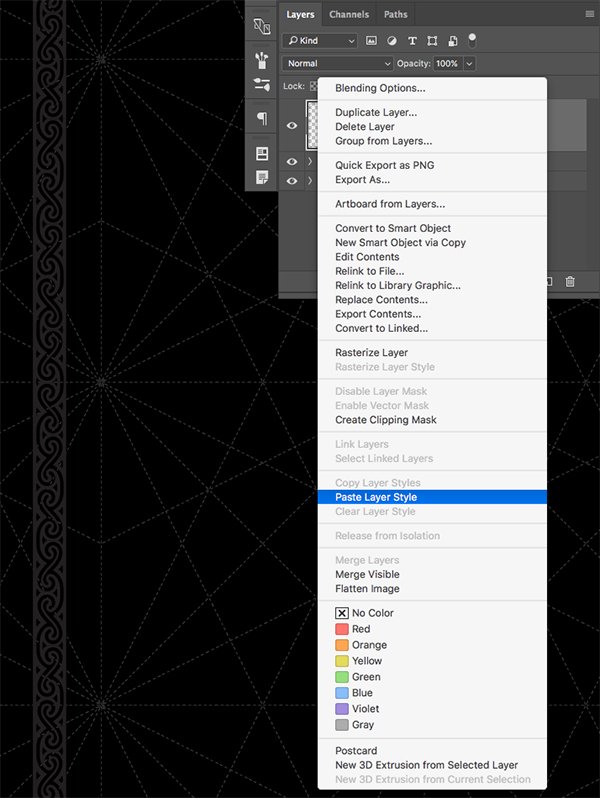
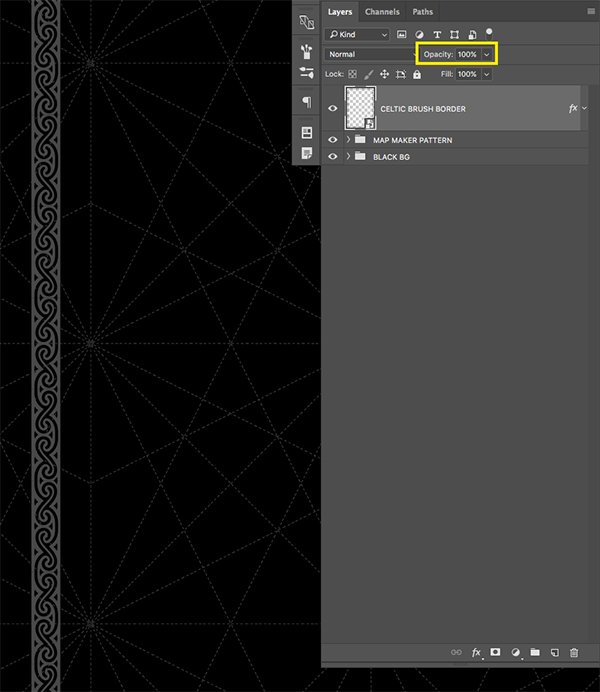
Your border color should now be the same as the grid in the background, merely we want to make certain that the opacity of this layer is all the way up.
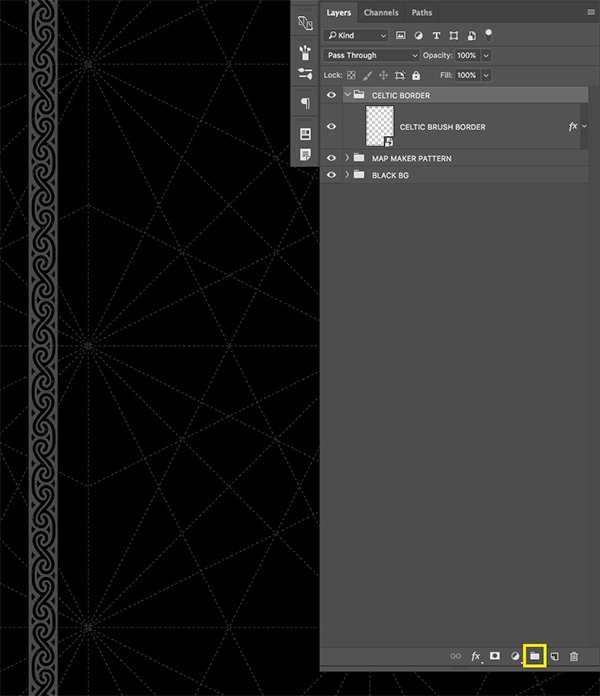
Select the 'CELTIC Brush Border' Smart Object in your Layers Palette and click on the folder icon at the bottom of the Layers Palette (or printing Control/Ctrl+G with the layer selected) to identify it into a new Group Folder. Double click on the folder name and modify it to 'CELTIC Border' every bit shown in the epitome beneath:
Step 5: Double Up
Earlier moving on, let's become back inside of our 'MAP MAKER Blueprint' folder and select the 'CHART Filigree 1' Smart Object. Printing Command/Ctrl+J to duplicate the layer one time to boost the visibility and contrast of the layer so that the grid stands out more.
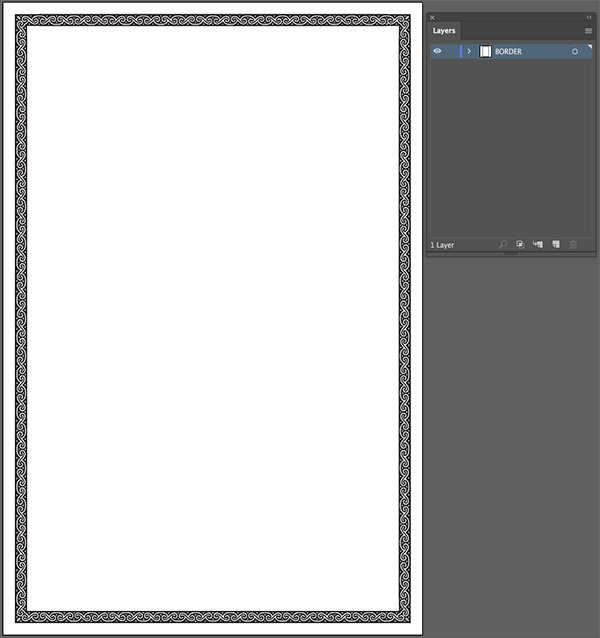
Pace six: Vintage Frame
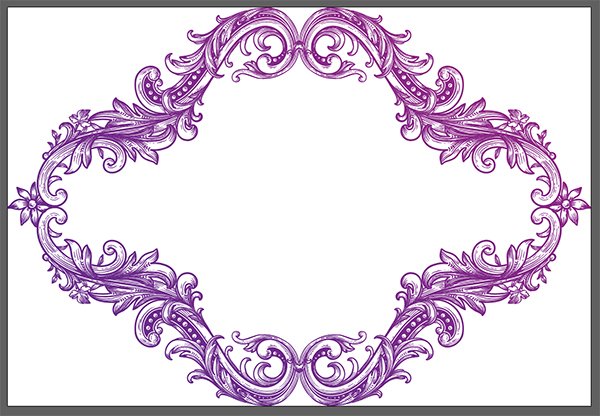
Next, open the 'vintageelements_2_frame.eps' file in Illustrator from the freebies binder. Select the frame and press Command/Ctrl+C to copy information technology and so render to Photoshop and paste information technology as a Smart Object every bit we did with our previous Smart Object files.
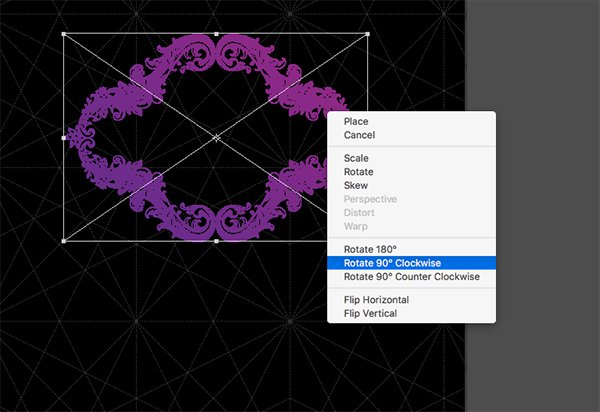
Once you take pasted the file, before pressing 'Enter' to utilize the changes, concord the Control Central and click on the shape to reveal a dropdown menu. From hither we want to choose the selection that says 'Rotate 90º Clockwise' and then elevate outwards from any of the four corners of the bounding box while holding the Alt/Selection+Shift keys to scale the frame upwards proportionally until it'southward a bit larger.
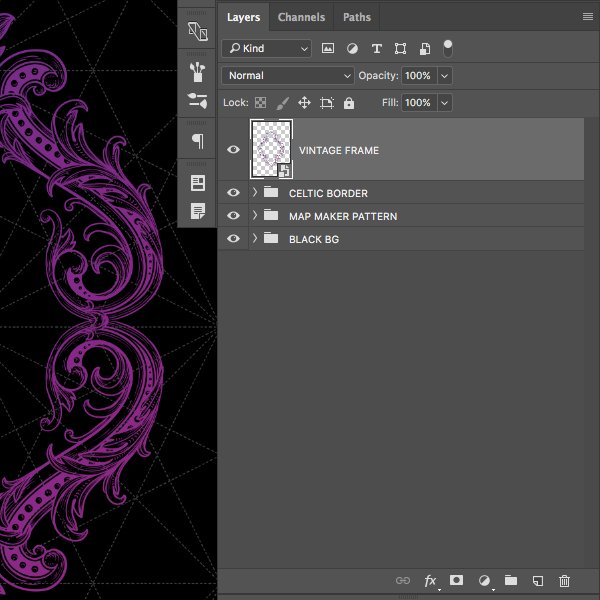
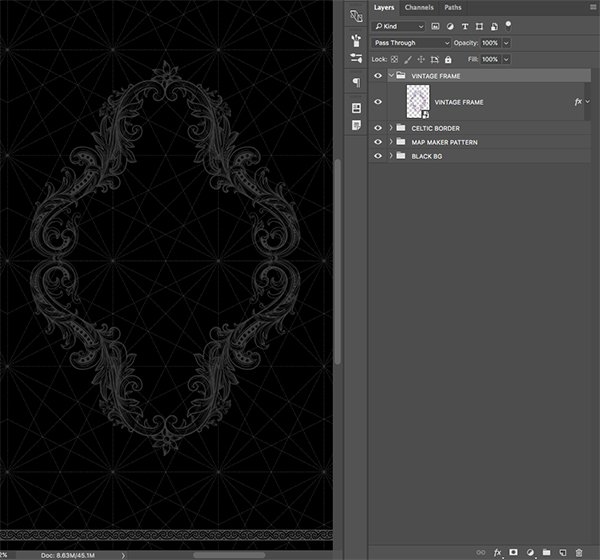
After applying the transformations double click on the layer name and modify it to 'VINTAGE FRAME' equally shown below:
Hold the Control Key and click on the layer and cull 'Paste Layer Fashion' to apply the same gray fill colour that we used in the previous steps. In one case over again brand sure that the opacity is set to '100%' earlier moving on.
Select the Smart Object layer one time once more and identify information technology into a Group Folder by pressing Command/Ctrl+G and rename the folder 'VINTAGE FRAME' earlier moving on so that nosotros can go on everything organized and like shooting fish in a barrel to find.
Step seven: Adding the Banner
Next, open up the 'vintageelements_2_banner.eps' file from the freebie binder for this tutorial. Select the file and re-create information technology past pressing Command/Ctrl+C, go back over from Illustrator to Photoshop, and and so paste the banner as a Smart Object by pressing Command/Ctrl+V.
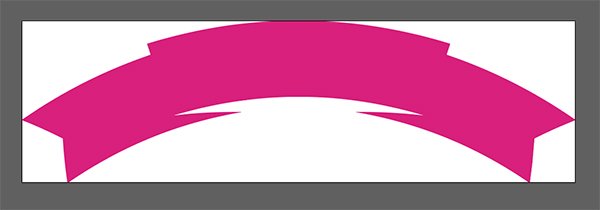
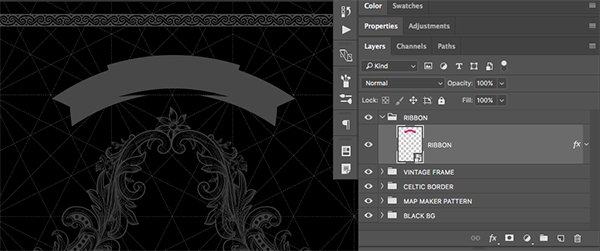
Double click the Smart Object name in your Layers Palette and change information technology to 'RIBBON' as shown beneath:
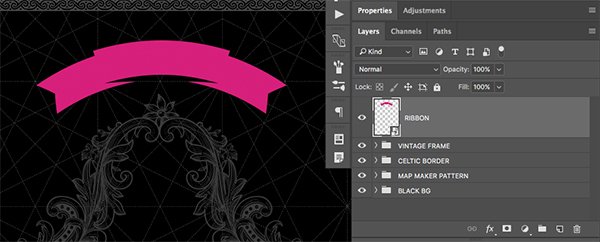
Concord the Control Key and click on the 'RIBBON' layer in your Layers Palette to reveal the dropdown menu. From here, select 'Paste Layer Style' once once again to change the ribbon to a greyness colour.
Double check to make sure the opacity of the layer is all the way up at '100%' and place information technology into a new folder named 'RIBBON' as shown in the image beneath:
Step 8: Banner Text
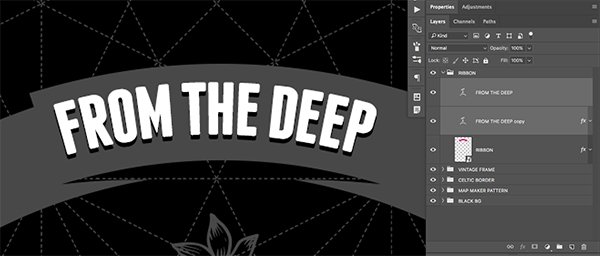
Aggrandize the 'RIBBON' folder and create a New Layer but above the Smart Object by pressing Command/Ctrl+Alt/Option+Shift+N on the keyboard. From here, printing 'T' to switch to your Blazon Tool and then type out the words 'FROM THE DEEP' in all majuscule using a font called 'Franchise' that can be downloaded for free at either FontZone.cyberspace or Fonts2U.com.
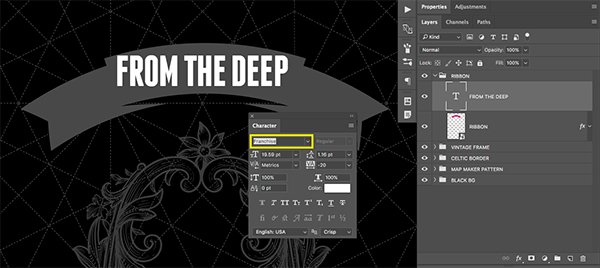
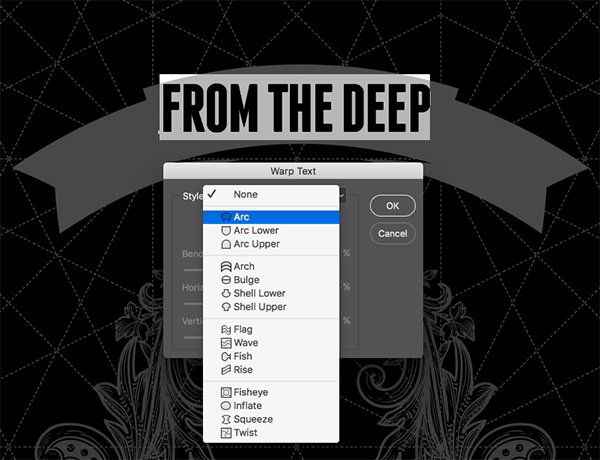
With your Blazon Tool still selected, double-click inside of your text to highlight it and and so click on the small 'T' icon with a curved line below information technology in the top toolbar. Here is the icon highlighted by the yellow box in the image below:

Yous should now take a 'Warp Text' panel that pops up and we want to click on the dropdown carte next to the 'Style' equally shown here:
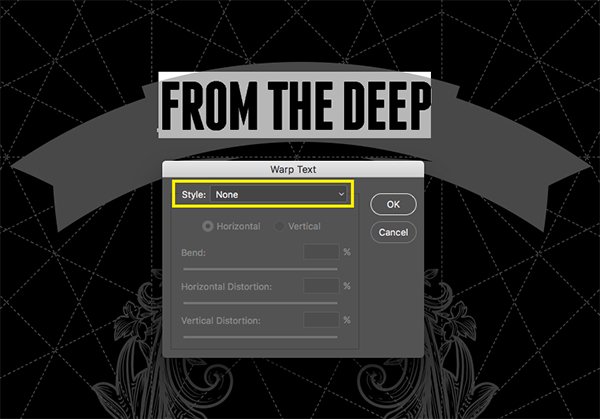
From the dropdown, choose the beginning option (Arc) from the list.
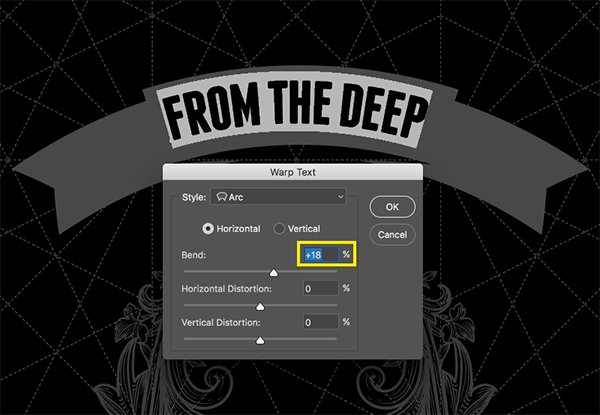
For the settings hither nosotros want to make sure that we have a Horizontal Bend of near 'xviii+' earlier pressing 'Enter' to apply the changes and so that your text bends with the ribbon below it.
Step 9: Drop It Like a Drop Shadow
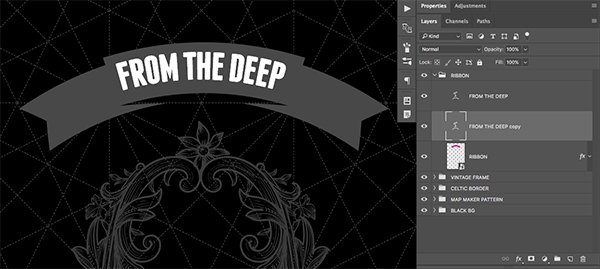
Select your text layer in the Layers Palette and printing Command/Ctrl+J to duplicate the layer. Next, press Command/Ctrl and the left bracket to move the layer down one spot so that the copy is below your original layer like this:
Double click on the duplicate text layer to bring up the Layer Style panel and cheque off the 'Color Overlay' option.
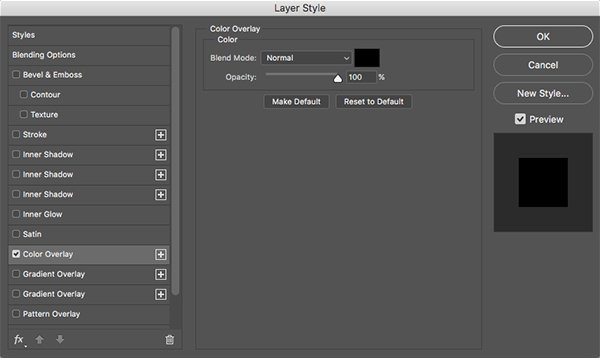
For the fill color we want to apply a solid black so enter a hex value of #000000 before pressing 'Enter' two times to apply the changes and close out of both dialog boxes.
Select your duplicate text layer and tap the downwards arrow a 4 or five times to create a prissy precipitous drop shadow.
Footstep x: In Da Club
Open the 'Club_w_Map_Maker_Brush.psd' file from the freebies binder.
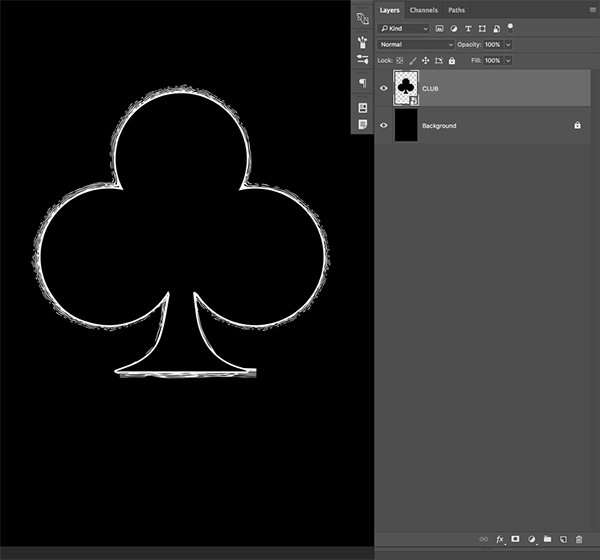
Click and drag the 'Club' Smart Object into your working certificate and place information technology in the center of the canvas and at the top of your Layers Palette.
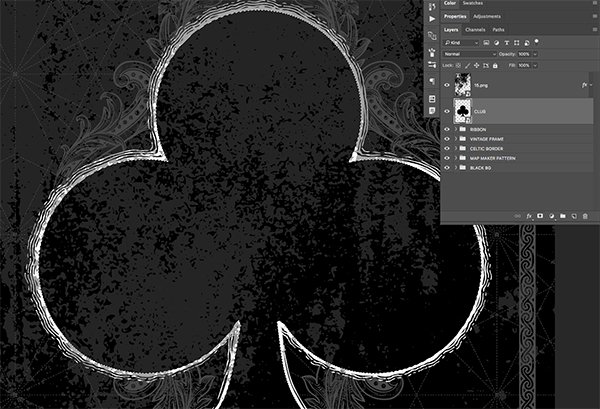
Footstep xi: Adding Some Grunge
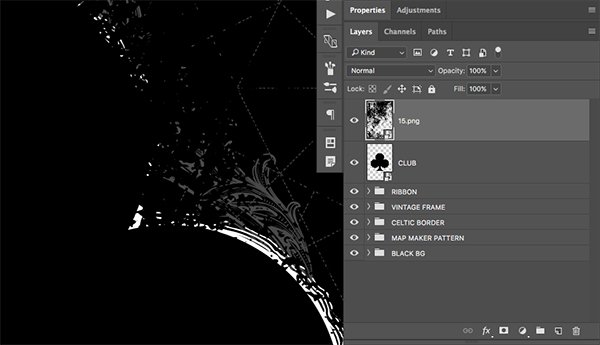
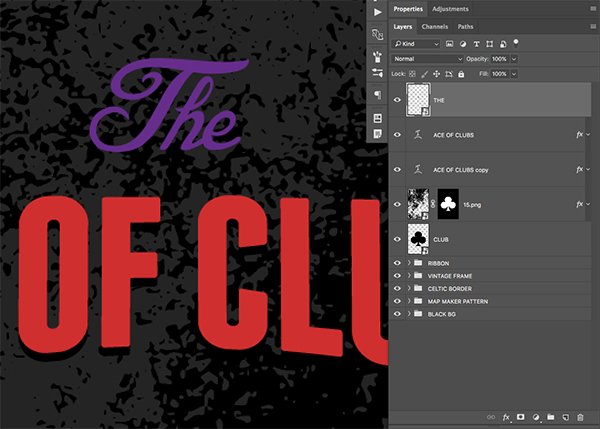
Next, open up the '15.png' file from the freebies folder.
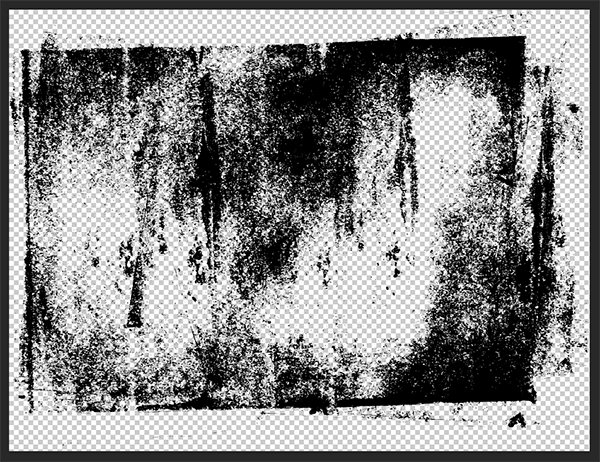
Click and elevate the grunge texture into your document, hold the Control Key and click on the layer and then choose the 'Convert to Smart Object' option before renaming the layer '15.png' and place information technology above the 'CLUB' Smart Object every bit shown below:
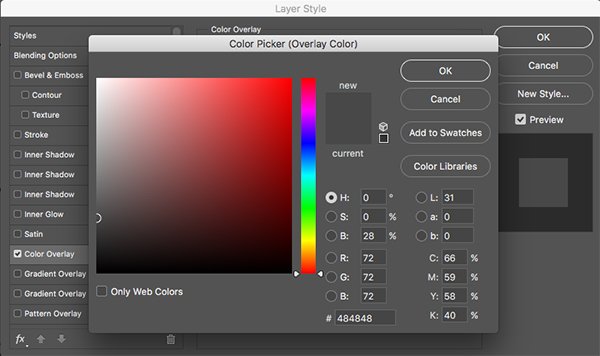
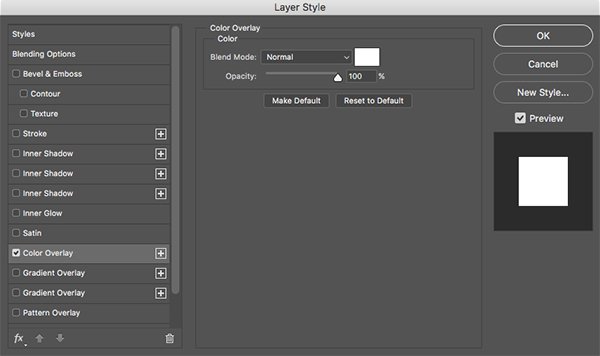
Double click on the 'xv.png' layer to bring up the Layer Style dialog box and check off the 'Color Overlay' option.
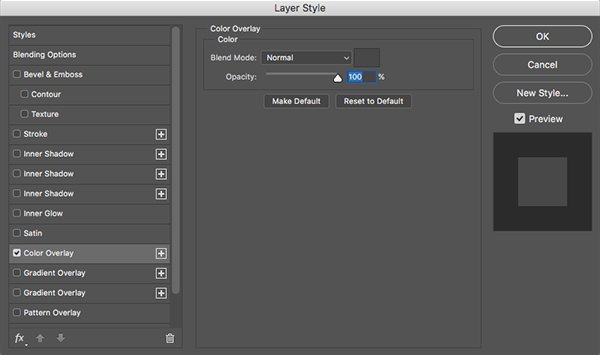
For the fill up color we will enter the aforementioned hex value from before – #484848. From there, printing 'OK' twice to apply the changes and close out of both dialog boxes and and so press the number '5' on the keyboard to change the opacity of the texture layer to 50% as shown below:
Step 12: Grunge Mask
Press 'Westward' to switch to your Magic Wand Tool, and then click inside of the blackness surface area of the 'CLUB' Smart Object on your canvass. You should now see the marching ants indicating a selection as shown here:
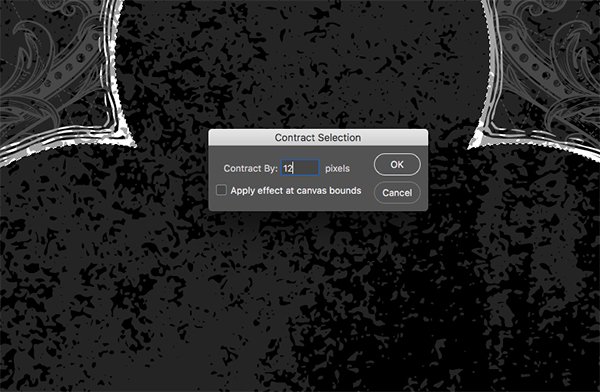
Go to the Select Bill of fare and choose 'Modify > Contract' every bit shown in the image beneath:
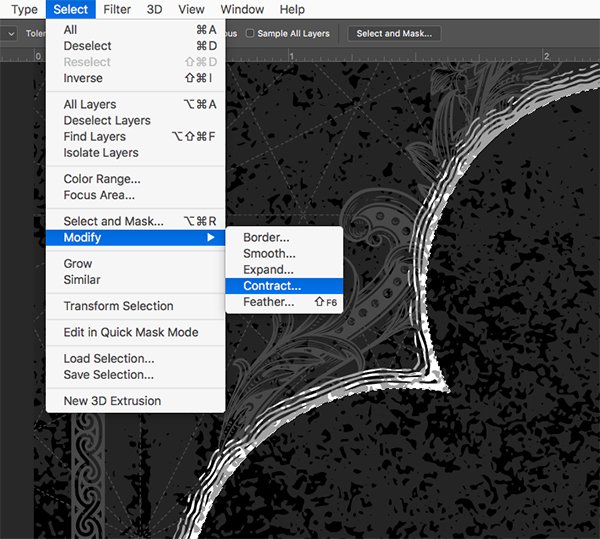
When the 'Contract Selection' box appears, enter a value of '12' for the amount and press 'OK'.
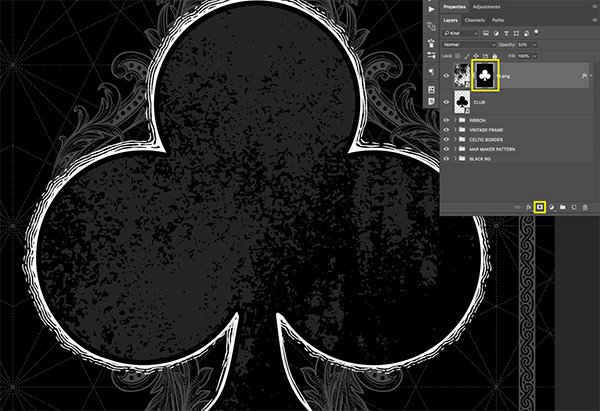
Select the 'fifteen.png' Smart Object layer and and so while your selection is nevertheless active click on the 'Add Layer Mask' icon shown at the bottom of the Layers Palette. Your grunge texture should now be masked to the inside of the club shape with a 12 pixel border around it like this:
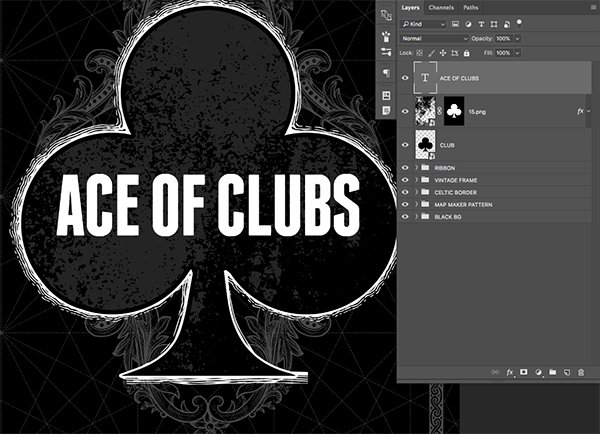
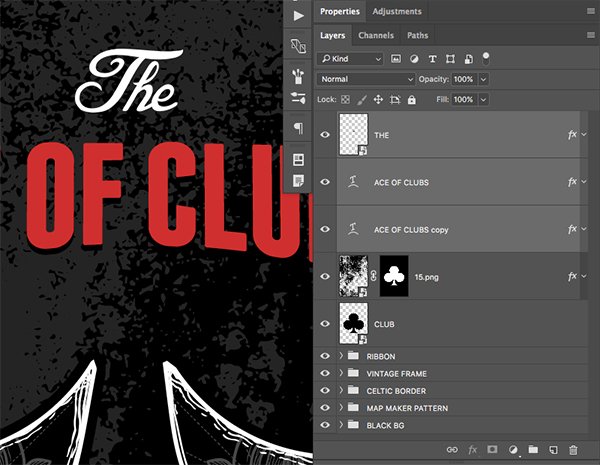
Step xiii: Ace of Clubs
Create a New Layer at the superlative of your Layers Palette and switch to your Type Tool (T) before typing out the words 'ACE OF CLUBS' in all uppercase using the same 'Franchise' font from before.
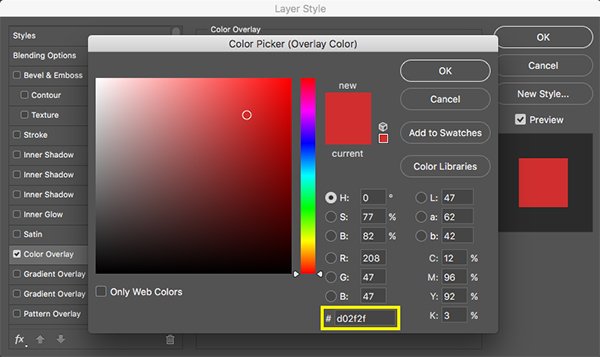
Double click on the layer to bring up the Layer Way dialog box and check off the 'Colour Overlay' box.
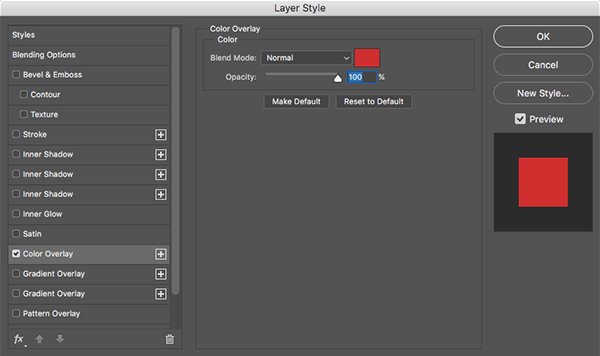
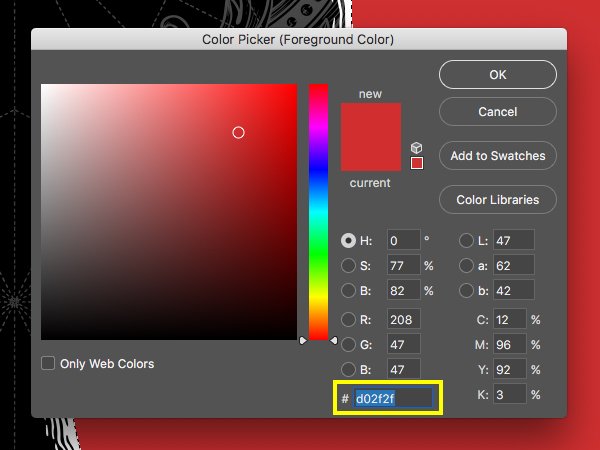
For the fill up color enter a hex value of #D02F2F so press 'OK' two times to apply the changes and close out of both dialog boxes.
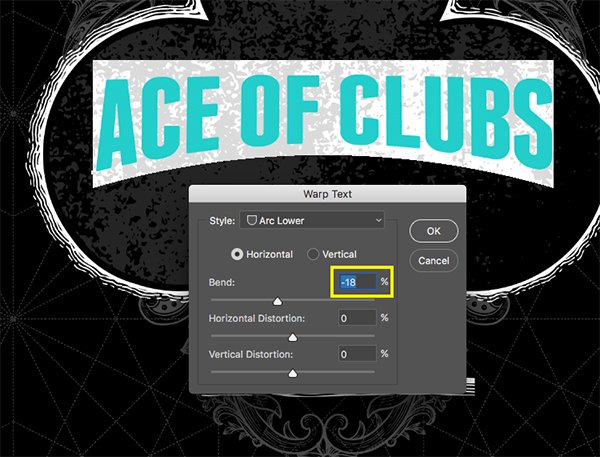
Use your Type Tool (T) to click twice within of your text phrase and highlight all of the copy. From there, click on the 'Warp Text' icon found in the tiptop toolbar, indicated past the yellowish highlight box in the image below:

From the 'Warp Text' dialog box, choose the 'Way' dropdown card and select 'Arc Lower' as shown here:
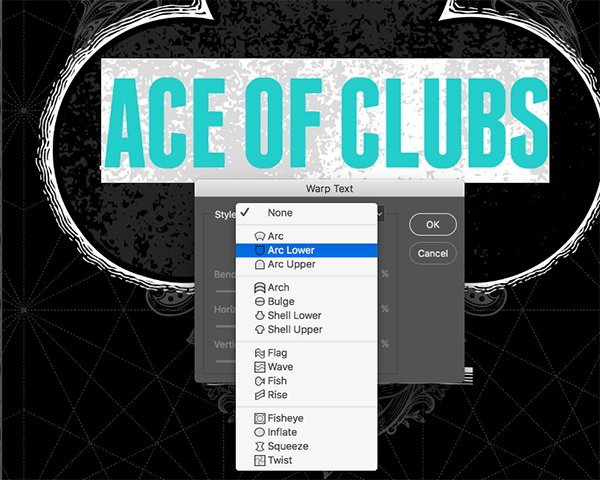
For the settings choose a 'Horizontal Bend' of '-18 %' equally indicated past the image below:
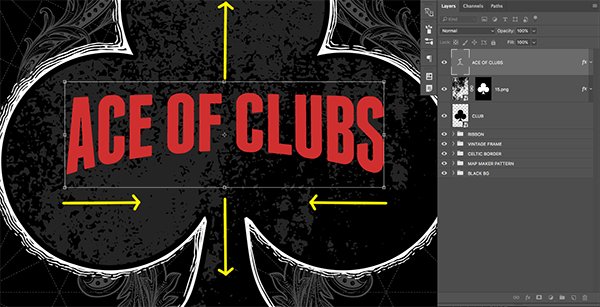
One time you've practical the warp, printing Control/Ctrl+T to initiate a Free Transform and then agree Alt/Option on your keyboard while dragging either of the side handles of the bounding box in towards the center to brand the text appear more condensed. After that, move your cursor over either the superlative or the bottom handle and drag outwards to make the text a bit taller.
Stride 14: Dropping the Ace
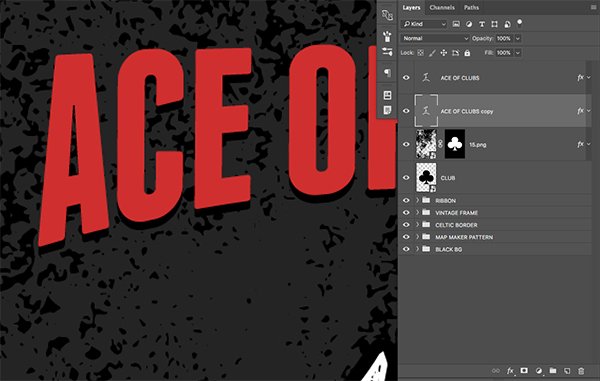
Select your warped text layer and printing Command/Ctrl+J to make a copy of it, and then press the Command/Ctrl key along with the left bracket key to move the copy of the layer beneath the original.
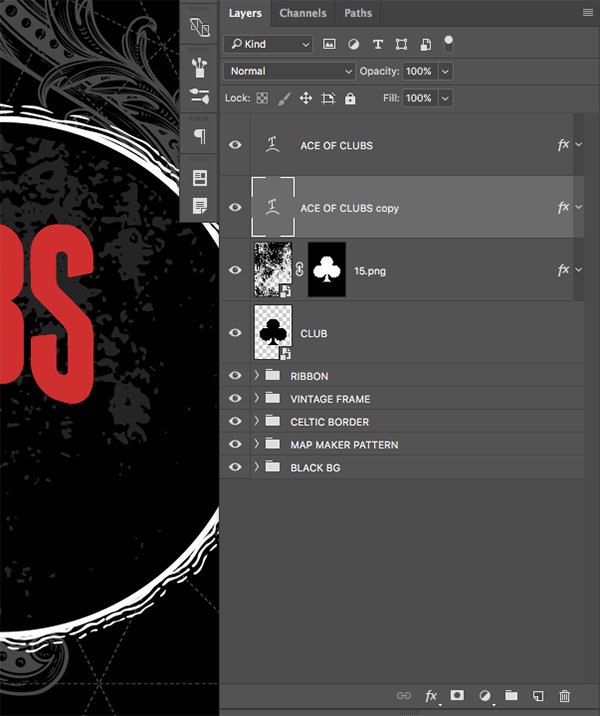
Double click on the layer to bring upward the Layer Way dialog box and bank check off the 'Color Overlay' box before applying a solid black fill. In one case you accept done that press 'OK' twice to close out of both boxes and utilize the changes. From here, select the duplicate text layer and tap it downward five or six times using the downwards arrow on your keyboard to create a drop shadow effect.
Stride 15: What the What?
Open the 'vintageelements_4_the.eps' file from the freebies folder.

Copy the discussion in Illustrator past selecting it and pressing Command/Ctrl+C and then return to Photoshop and paste it as a Smart Object (Command/Ctrl+V). Place the Smart Object at the height of your Layers Palette as shown below:
Double click on the layer to bring up the Layer Fashion dialog box and check off the 'Colour Overlay' choice.
For the fill color use a solid white (hex value #FFFFFF). From hither, press 'OK' two times to apply the changes and close out of both dialog boxes.

Footstep xvi: The The Folder
Select the top layer in your Layers Palette (should be 'the' Smart Object) then hold the Shift Fundamental and select the 'ACE OF CLUBS re-create' layer so all 3 layers are selected at the same fourth dimension.
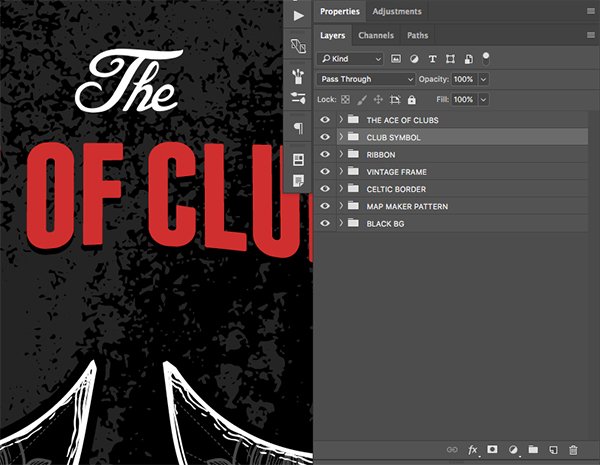
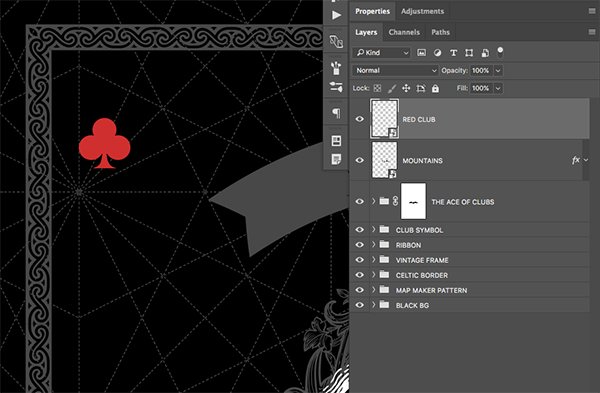
Printing Control/Ctrl+Grand to place the layers into a new folder. Double click on the folder name to change it to 'ACE OF CLUBS' as shown here:
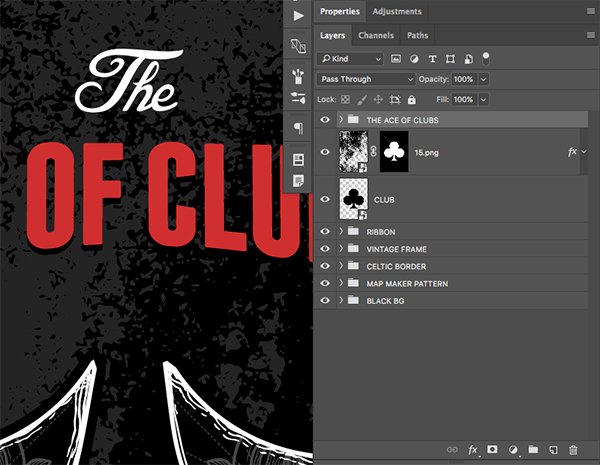
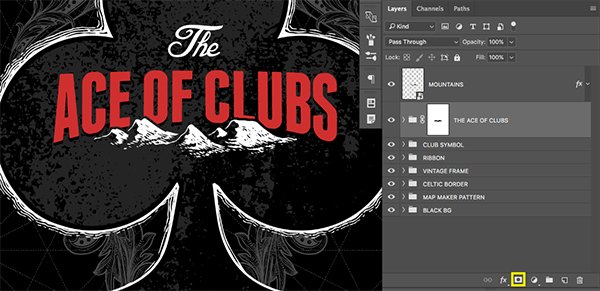
Echo this for the side by side two layers, placing the 'xv.png' layer and 'Society' layer into a new folder named 'Society SYMBOL'.
Step 17: Scaling Mountains
Open the 'Map_Maker_Mountain_Symbol.eps' file from the freebies folder for the tutorial in Adobe Illustrator.
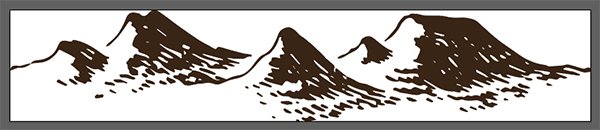
Copy and paste the shape as a Smart Object from Illustrator into Photoshop and calibration them up a fleck past dragging outwards from whatever of the iv corners of the bounding box while property the Shift Key. Place the mountains towards the lesser of your 'ACE OF CLUBS' text running across the lesser. From hither, double-click the layer to bring up the Layer Style options and add a solid white fill.
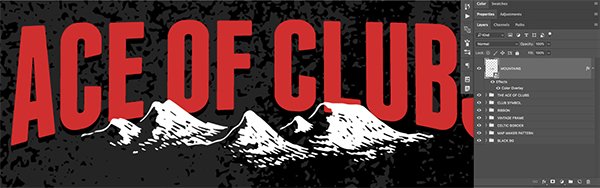
Once y'all've added the white 'Color Overlay' become ahead and click on the layer thumbnail icon while property the Command/Ctrl central to actuate a option around the shape.
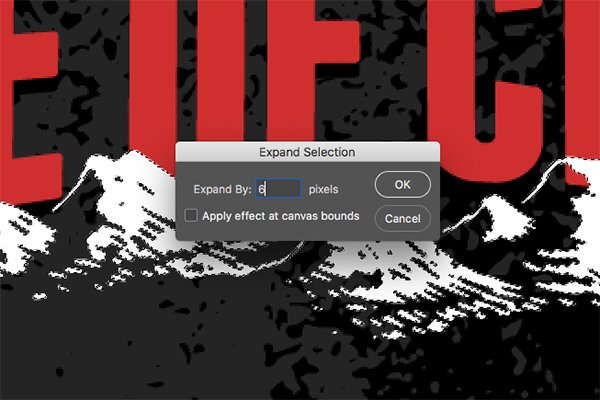
Go to the Select Card and choose 'Alter > Expand' every bit shown below:

When you are prompted with the dialog box enter a value of '6 px' and press 'OK' to employ the changes.
Render to the Select Carte and choose the 'Inverse' option to invert your choice.
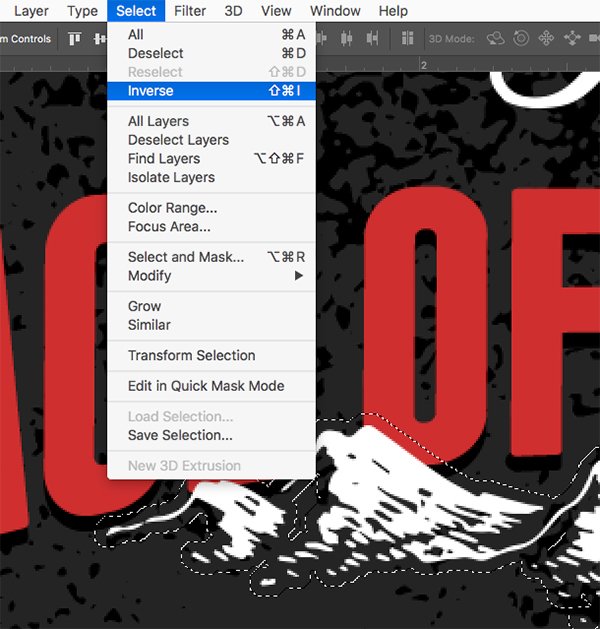
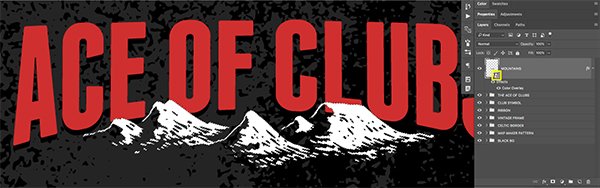
Select 'THE ACE OF CLUBS' folder and then while your inverted selection is even so active, click on the 'Add Layer Mask' selection at the bottom of the Layers Palette. You should at present have something similar this:
Stride 18: Corner Clubs
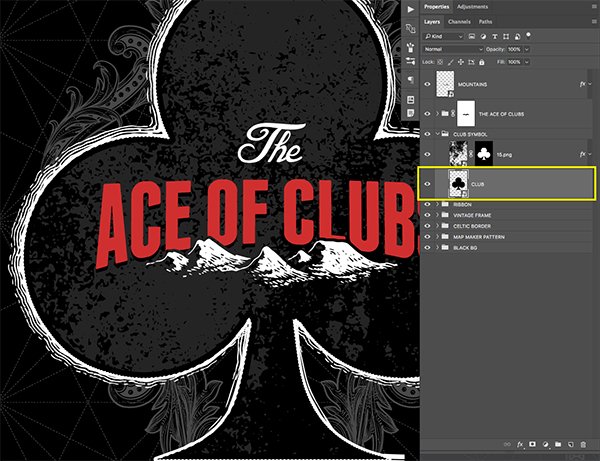
Expand the 'Order SYMBOL' folder and then press 'Westward' to switch back to your Magic Wand Tool. Make sure that the 'CLUB' Smart Object layer is selected and click within of the shape on your sheet with the Magic Wand Tool to activate a selection around the inner part of the shape.
Press Command/Ctrl+Alt/Option+Shift+N to create a New Layer. Alternatively, you can but select the 'New Layer' icon at the bottom of the Layers Palette. From there, click on the foreground color in the toolbar and change the color to #D02F2F as shown here:
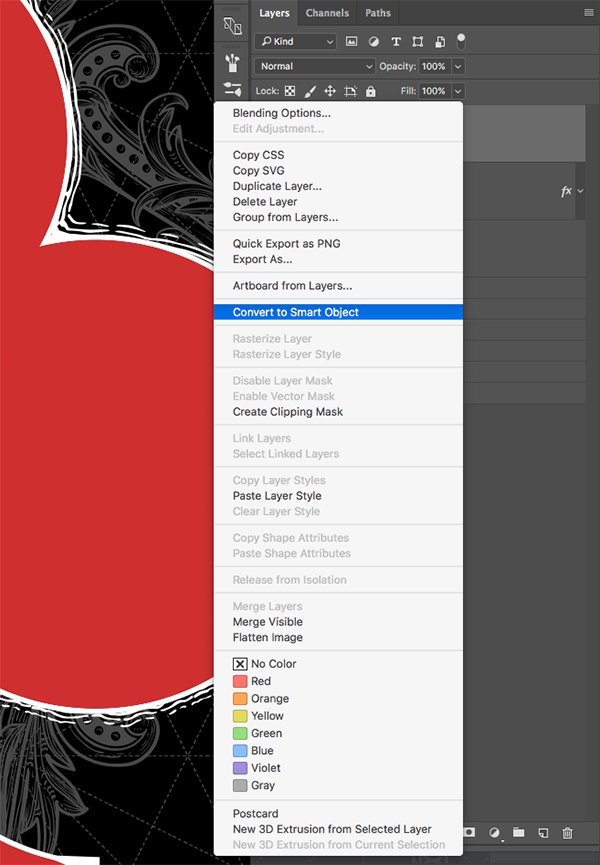
Printing 'OK' and then select your new layer and printing Alt/Option+Delete on the keyboard to fill up the choice with your ruddy colour. Later on that press Command/Ctrl+D to deselect everything and motility the layer to the top of your Layers Palette. After that, click on the layer while holding the Command Key to reveal a dropdown menu. From this list choose the 'Catechumen to Smart Object' option.
Double click on the layer name and modify it to 'Cherry CLUB' and so press Command/Ctrl+T to apply a Free Transform. Concur the Shift Key and drag inwards from any of the iv corners of the bounding box around the shape to calibration it downward proportionally until it roughly matches the size of the scarlet society in the image below:
Step 19: All A'southward
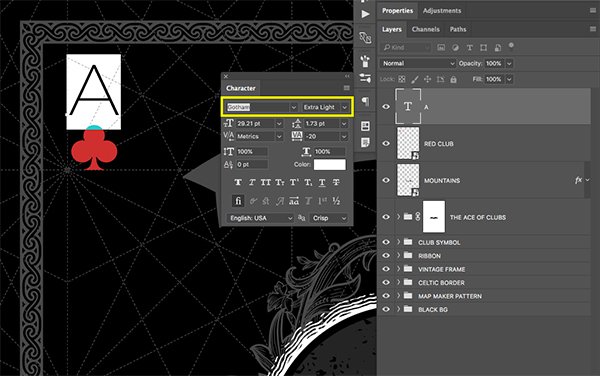
Create another layer higher up your 'RED Guild' Smart Object and switch to your Type Tool (T). Blazon out the letter 'A' using a calorie-free font such every bit 'Gotham' or yous can use something similar such as Avenir or Helvetica. Identify the letter above the ruby order every bit shown here:
Select the 'A' in the Layers Palette and then hold the Shift Cardinal and select the 'RED Social club' layer beneath so they are both selected at the same time.
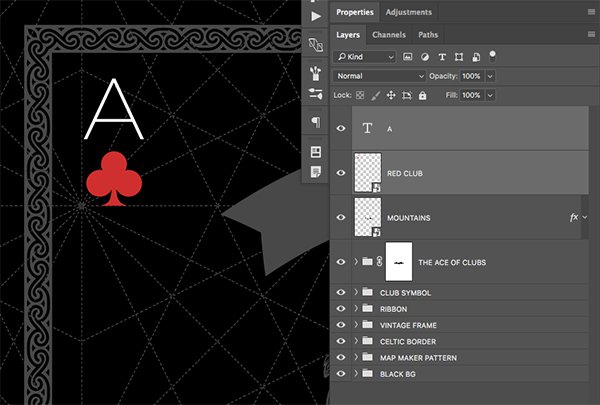
With both layers selected, press Command/Ctrl+One thousand to put them into a new folder and rename it 'CLUB SYMBOL TOP CORNER' every bit shown below:
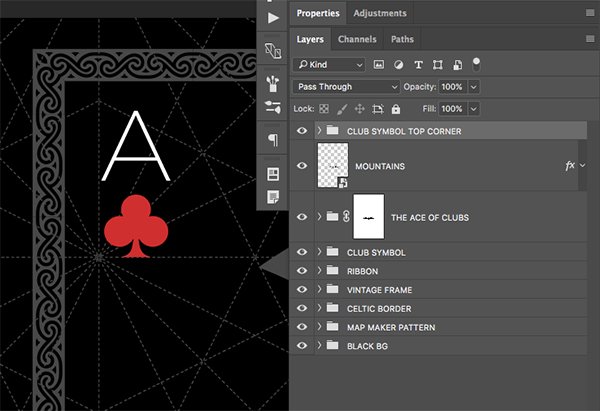
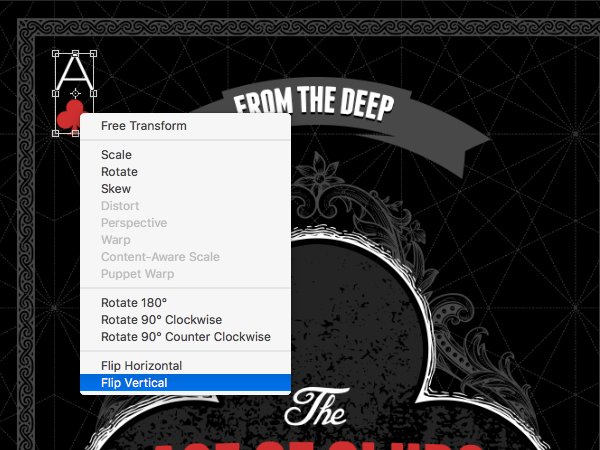
Select the 'CLUB SYMBOL Acme CORNER' folder and press Control/Ctrl+J to duplicate it. Press Command/Ctrl+T to initiate a Costless Transform and then click on the letter of the alphabet and shape on your canvass while holding the Control key on the keyboard. You should and so run into a dropdown card where yous will desire to choose 'Flip Horizontal' and and then click again and cull 'Flip Vertical' so your letter and shape now appear to exist reflected.
Move this upside-downward copy to the lower right corner and and so double click on the folder name in the Layers Palette and change the proper noun of the folder to 'Guild SYMBOL BOTTOM CORNER' and you should now have something like this:
Step 20: Setting Canvas
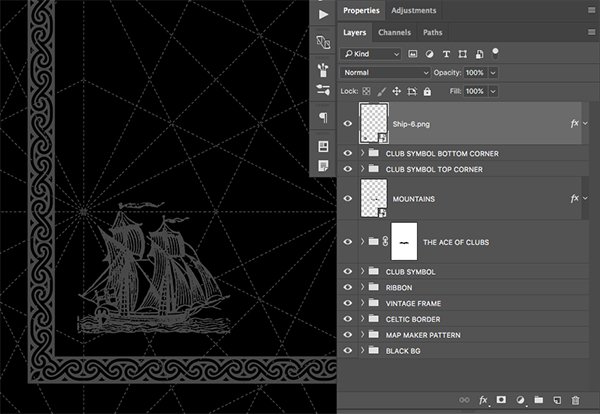
Open up the 'Ship-vi.png' file from the freebie binder in Photoshop.
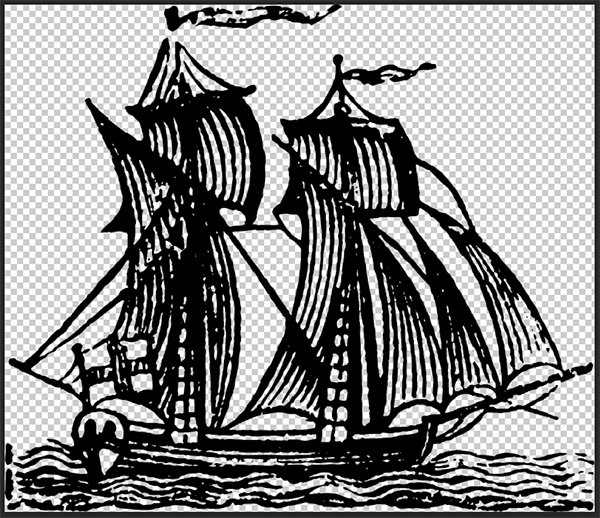
Drag the file over into your document and catechumen it into a Smart Object before changing the name of the layer to 'Send-six.png' or something similar that will make it easy for y'all to identify.

Double click on the layer to bring up the Layer Style options and bank check off 'Color Overlay' as shown below:
For the make full color enter a hex value of #484848 earlier pressing 'OK' twice to use the changes and close out of both dialog boxes.
Press Command/Ctrl+T to initiate a Gratuitous Transform and then hold the Shift Central and drag inwards from any of the four corners of the bounding box to scale the send down proportionally in size. Move the send to the lower left hand corner of the layout as shown here:
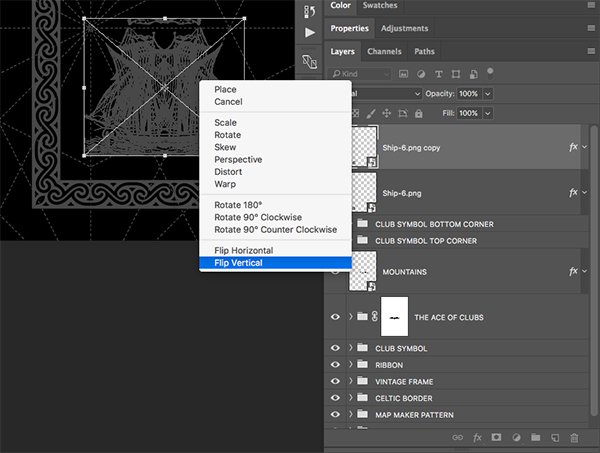
Press Control/Ctrl+T to initiate a Free Transform one time once again and and then click on the ship while holding the Control Cardinal. Cull 'Flip Horizontal' from the menu that appears.
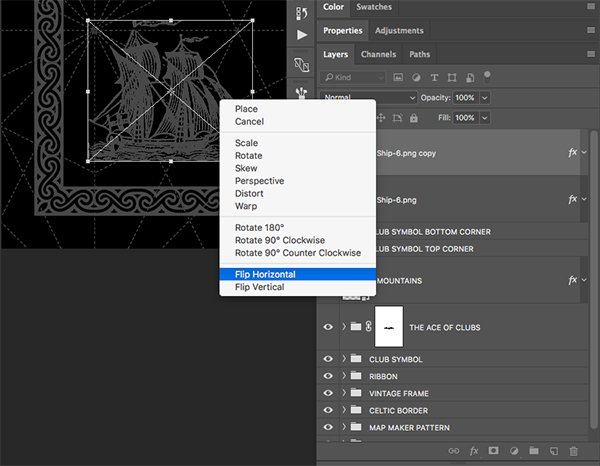
Hold the Command Key and click once over again, and this time choose 'Flip Vertical' to flip the ship both means before pressing 'Enter' on the keyboard to utilize the transformation. Side by side, motility this copy to the upper right paw corner of the layout.
Afterward placing both copies of the ship, select the top re-create in your Layers Palette, and then concord the Shift Key and select the copy directly beneath information technology. You should now take both copies of the ship selected every bit shown here:
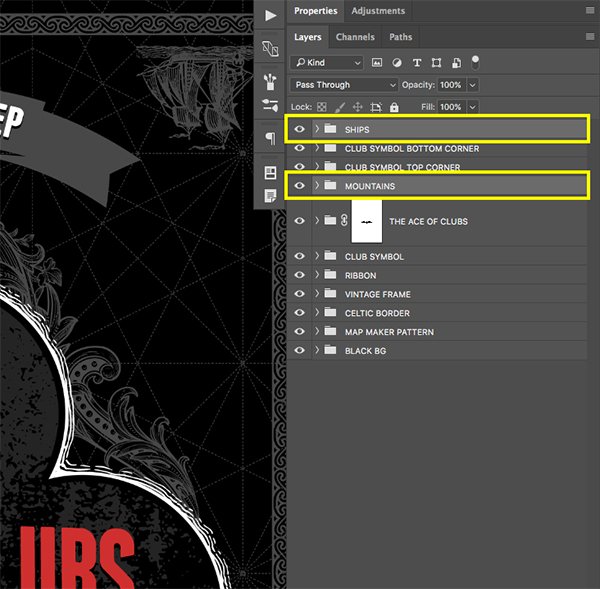
While both layers are selected, printing Control/Ctrl+Grand to place them into a new folder and alter the name of the folder to 'SHIPS'. Experience free to do the same matter for the loose 'Mountains' Smart Object by placing it into a folder chosen 'MOUNTAINS' or use a like name of your selection.
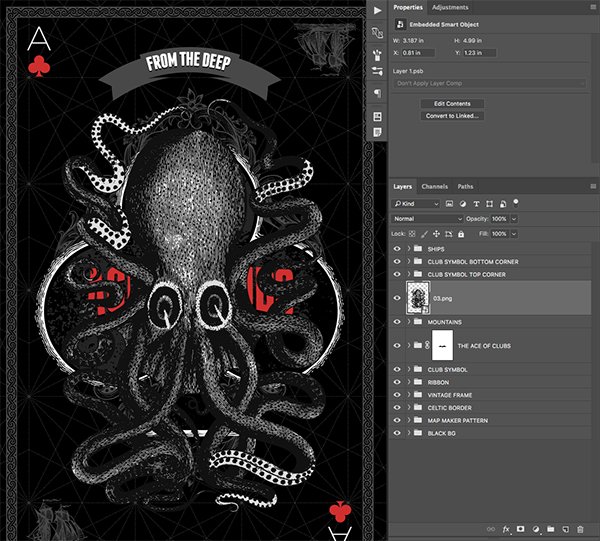
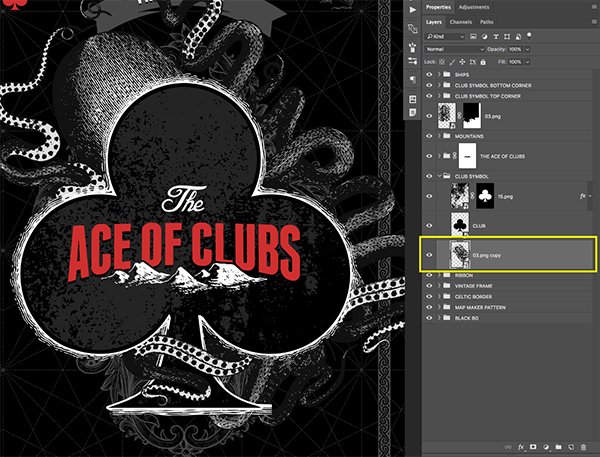
Step 21: Getting It Kraken
Open the '03.png' file in Photoshop.
Note: This freebie is unfortunately not available.
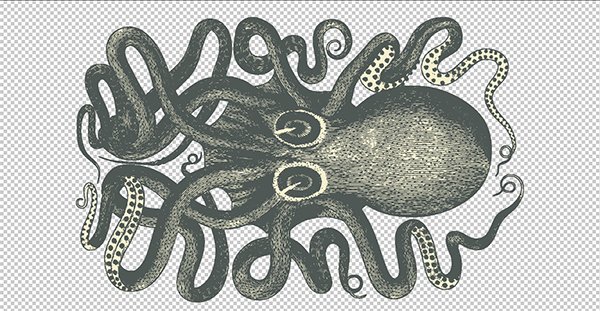
Click and drag the image into your document then agree the Command Key and click on the layer in the Layers Palette. From the dropdown menu we want to cull the option that says 'Convert to Smart Object' and then double click on the layer name to change information technology to '03.png' or another proper noun that will make the layer easy to identify.
Select the layer and press Command/Ctrl+T to initiate a Costless Transform. From here, hold the Control Key and click on the creature to reveal the dropdown menu. From here we will choose the option that says 'Rotate 90º Counter Clockwise' earlier pressing 'Enter' on the keyboard to apply the changes.
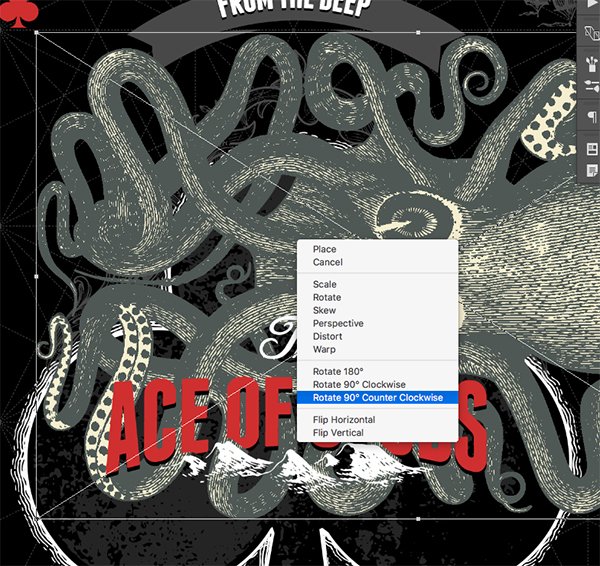
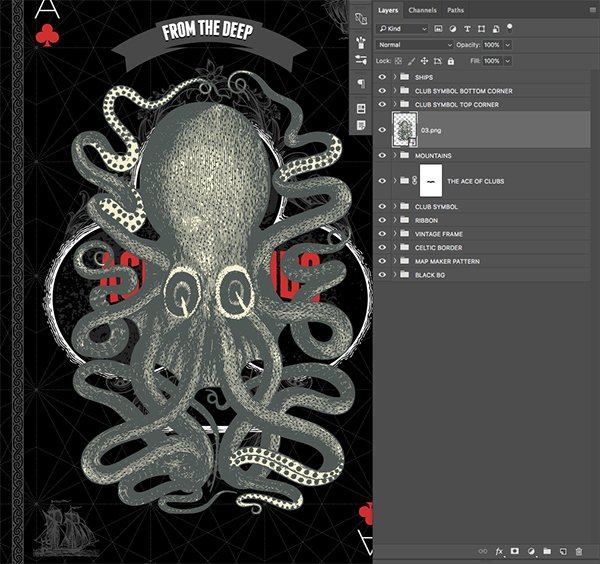
In one case your bounding main beast is vertical, move the Smart Object layer above the 'MOUNTAINS' folder equally shown beneath:
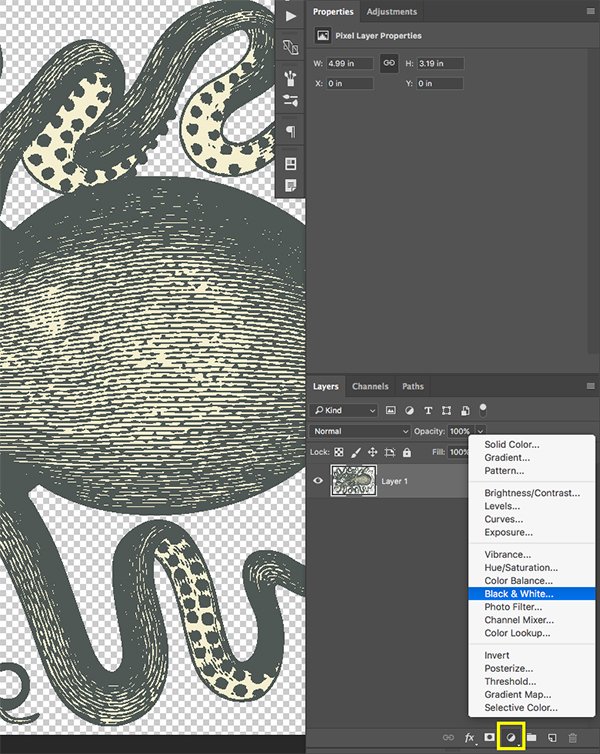
Step 22: Inky Squid
Double click on the '03.png' Smart Object layer to open up it in a new window. Click on the 'Adjustment Layer' icon institute at the bottom of the Layers Palette and then choose 'Blackness & White' from the list as shown here:
Notation: This freebie is unfortunately non available.
Render to the Adjustment Layer icon and this fourth dimension choose 'Levels' from the list that appears.
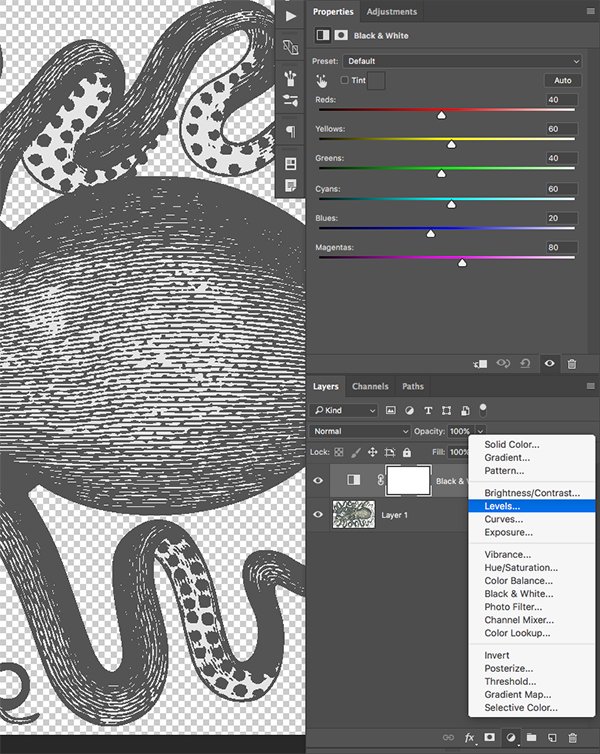
Once the properties are shown, move the left paw slider in towards the correct then that it's ready to near '72' as shown here:
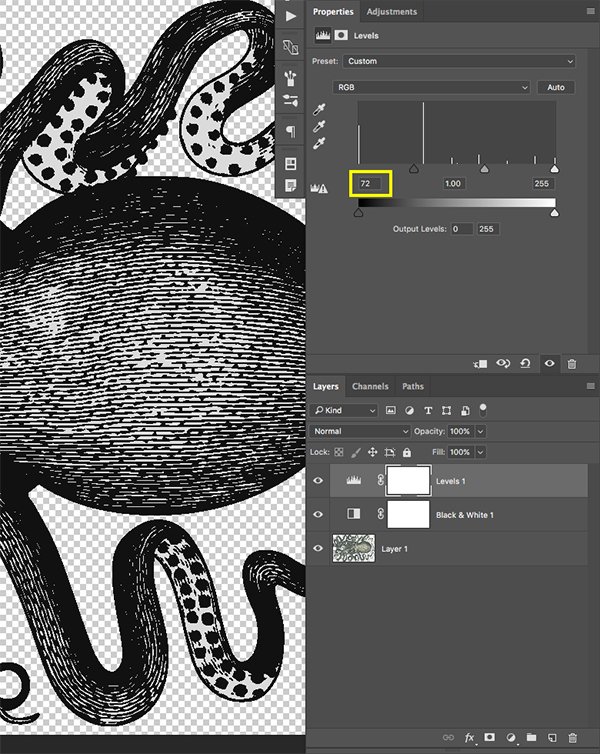
Afterwards you've applied both of these Aligning Layers inside the Smart Object file, press Command/Ctrl+Due south to save the changes. You lot can now press Command/Ctrl+Westward to close the tab and return to your primary document where you should now encounter the changes taking reflected in your chief PSD file.
Pace 23: Squid Mask
Position the squid and so that you have a cool looking part of the tentacles overlapping the lesser 'stalk' of the social club shape. Once you have done that click on the 'Add Layer Mask' icon at the bottom of the Layers Palette.
Annotation: This freebie is unfortunately not available.
Apply a solid black foreground color and switch to your Castor Tool (B) and paint over the entire squid except for the part of the tentacle nearly the stem. What we want to practice here is create the illusion that the tentacle is coming from behind and so in front of the club shape and so once we pigment out almost of the creature we can hold the Command/Ctrl key and click on the layer thumbnail icon of the 'Gild' Smart Object to activate a option around information technology. From in that location we can paint out the parts of the tentacle that we want to get behind the stalk of the lodge shape.

After tweaking the positioning slightly you should now have something like this:
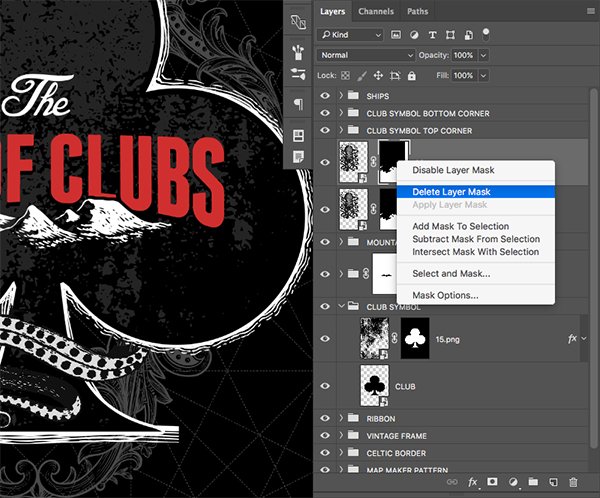
Pace 24: Squid Copy
Select the '03.png' Smart Object layer and press Command/Ctrl+J to duplicate it.
Note: This freebie is unfortunately not available.
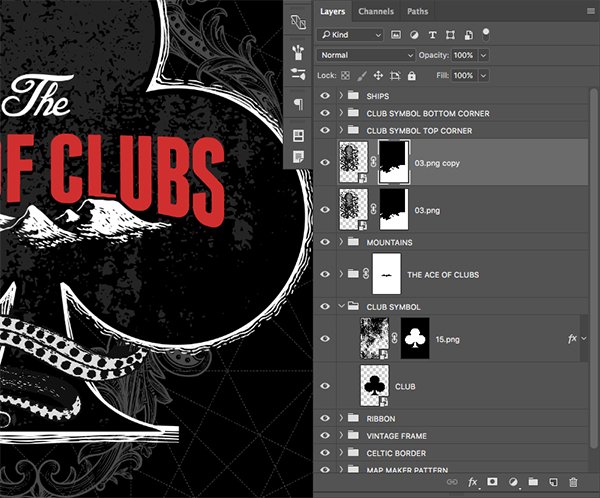
Hold the Control Key and click on the mask attached to the duplicate layer and then choose 'Delete Layer Mask' as shown below:
We are now going to place this re-create below the 'CLUB' layer as shown here:
Next, click on the 'Add Layer Mask' icon at the lesser of the Layers Palette to attach a new mask to this copy of the bounding main beast Smart Object.
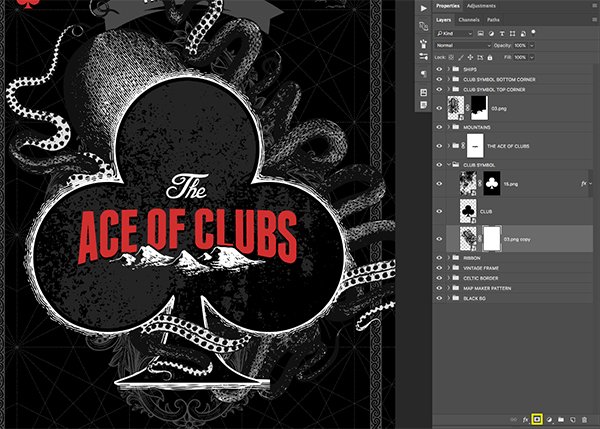
Reposition the squid and so that you lot tin can get another interesting function of the tentacle positioned behind the club shape and so pigment out everything except for that one section using a hard round black brush. Here is what I wound up with:
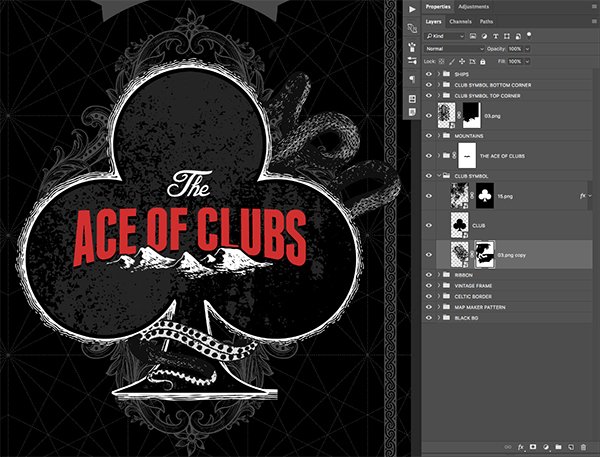
Stride 25: The Main Squeeze
Select the '03.png copy' Smart Object layer and press Control/Ctrl+J to duplicate it. Repeat the step for deleting the Layer Mask by clicking on information technology while holding the Control Key and choosing 'Delete Layer Mask' from the dropdown. After that, press Command/Ctrl+T to do a Gratis Transform and rotate or flip the squid to add some variation.
NOTE: This freebie is unfortunately not bachelor.
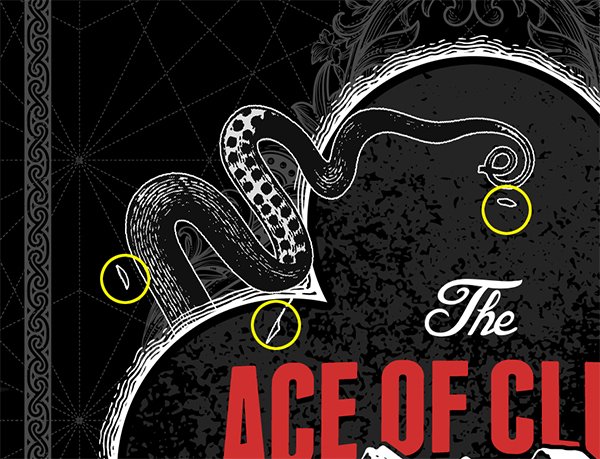
Here I am looking for a function of the tentacle that volition overlap the top of the club shape.
Attach a new Layer Mask and once more pigment out all of the squid with a black round brush except for the height piece that nosotros want to overlap the primary club shape. Hold the Command/Ctrl key and click on the layer thumbnail icon of the 'Society' layer to once again activate a selection around it. Next, paint out the surface area indicated by the yellowish circle in the epitome below:
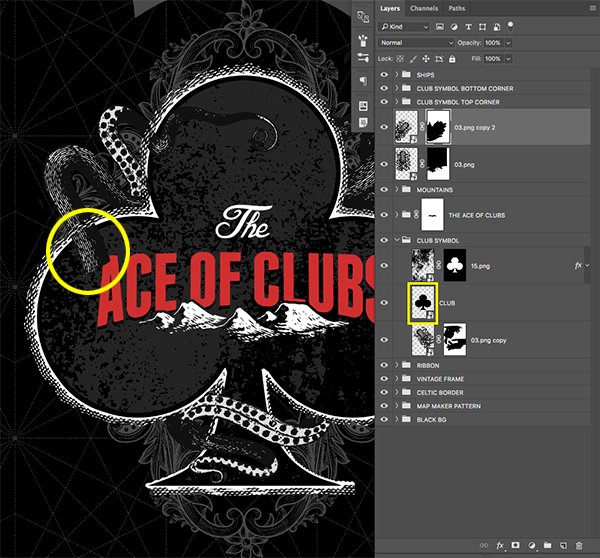
It should now look every bit though the tentacle is coming from behind the club shape and overlapping it in the forepart. Yous may wish to add one or more copies either in forepart or behind the main guild shape, but the process for painting out different sections or pieces of the squid volition exist the aforementioned.
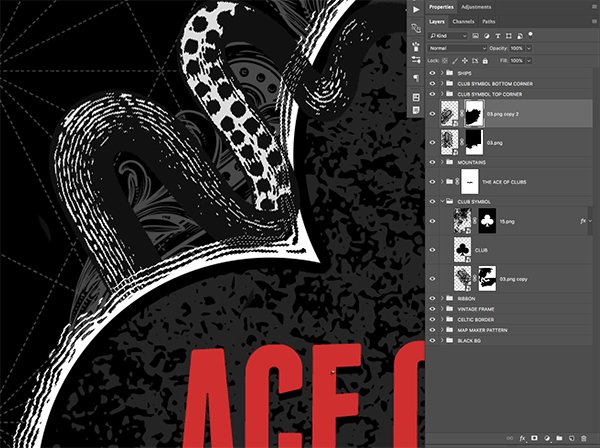
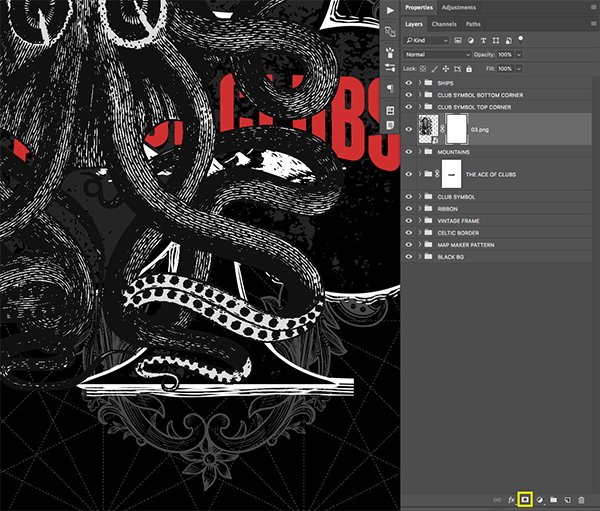
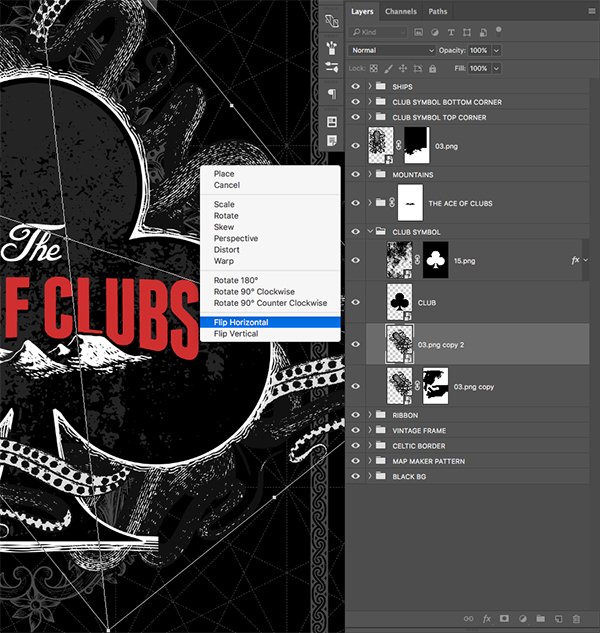
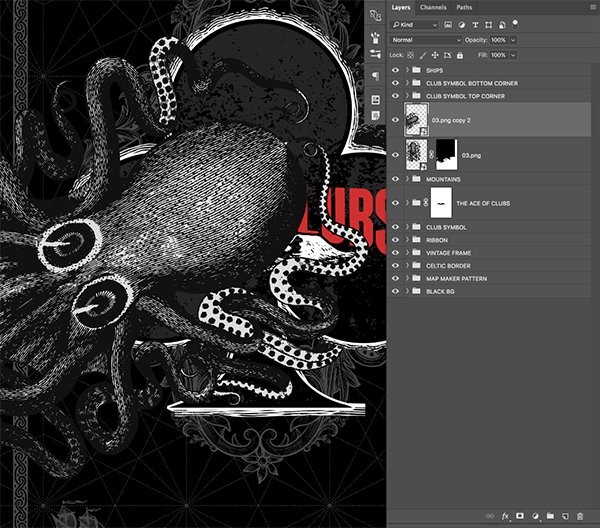
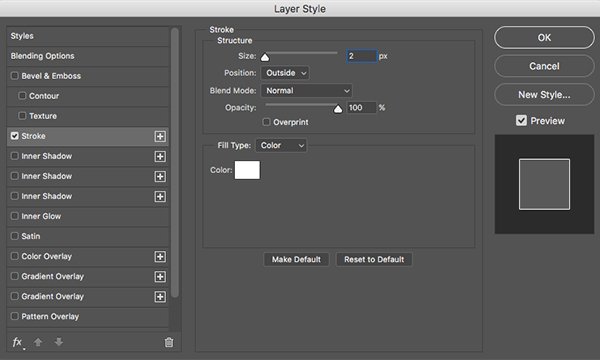
Stride 26: Kraken Outlines
Once y'all are happy with the shapes and have a few copies to work with, double-click on one of the '03.png' Smart Object layers to bring upwards your Layer Styles. Check off the 'Stroke' option and apply a 2 pixel stroke prepare to 'Outside' using a solid white fill color as shown beneath:
NOTE: This freebie is unfortunately not available.
Once y'all've applied the stroke yous may detect a few stray bits that we might have missed that are now more than obvious. Nosotros will want to get back in and pigment these smaller areas out.
Subsequently you take painted out any unwanted areas from the layer, hold the Command Cardinal and click on the minor 'fx' icon and then choose 'Copy Layer Styles' from the dropdown menu.
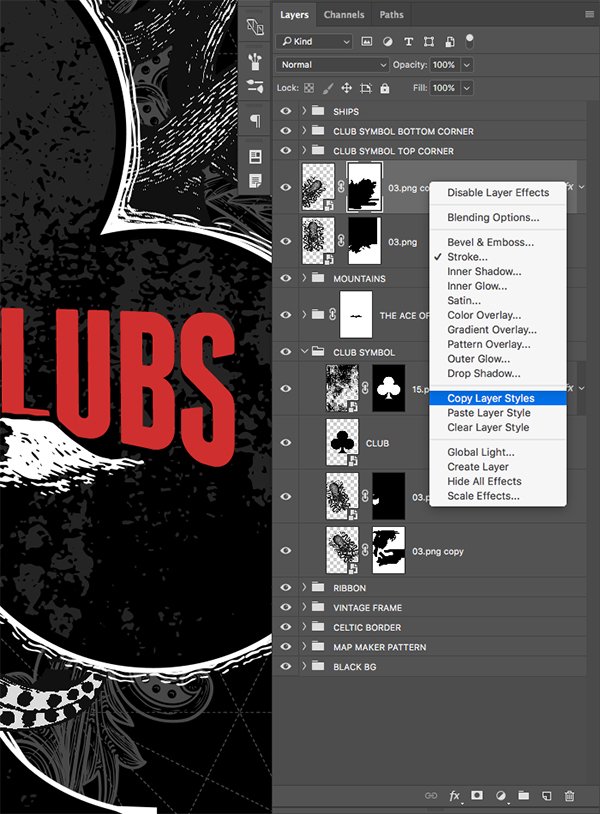
Hold the Command/Ctrl central and click on all of the remaining copies of the '03.png' layers so they are all selected at the same time.
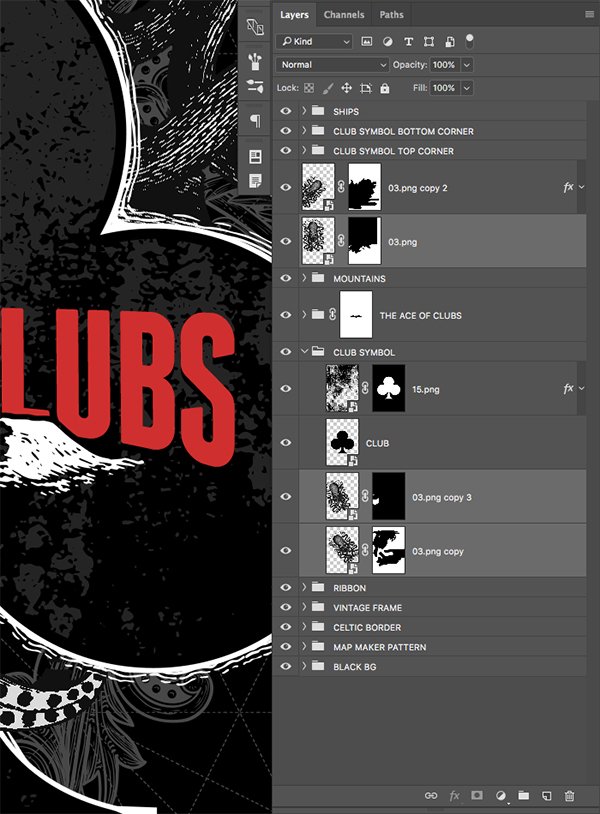
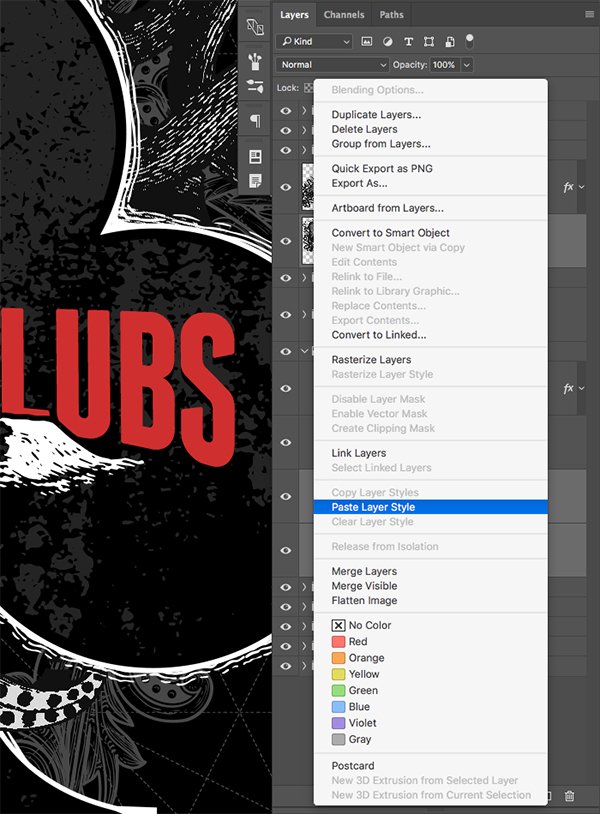
Concord the Control Key and so click on whatsoever ane of the remaining duplicate layers and y'all should see a dropdown menu. From here nosotros want to choose the 'Paste Layer Way' option in order to copy the aforementioned stroke settings to all of the remaining copies. Repeat the process for masking out whatsoever stray pieces that may now be more visible considering of the white stroke that we have added.
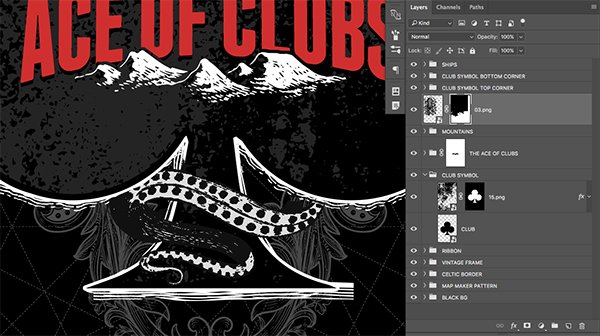
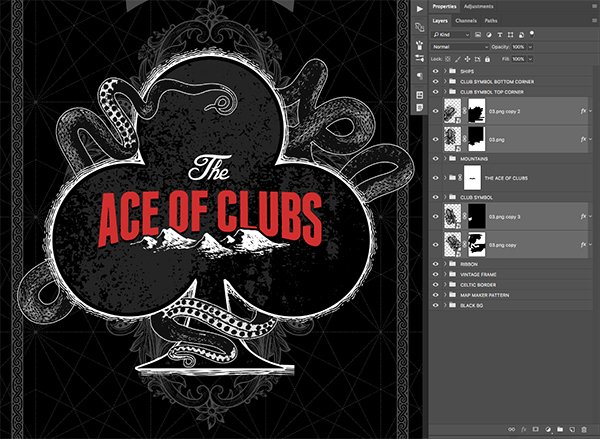
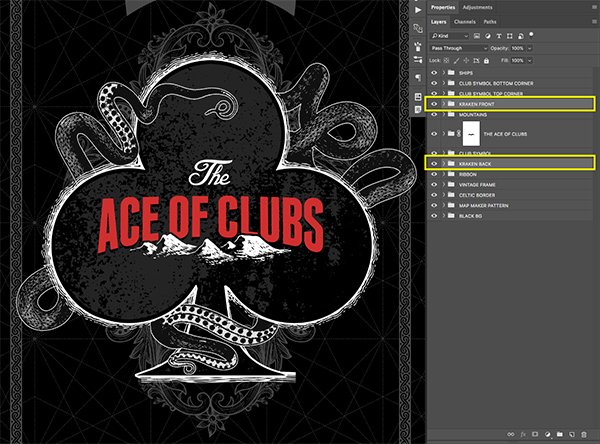
Step 27: Kraken Folders
After applying the thin white stroke to all of the tentacle shapes and cleaning up any devious segments, hold the Command/Ctrl central and select the copies that are in front. Press Control/Control+Thou to put those copies into a new binder and name information technology 'KRAKEN Front' and so do the same for the copies behind the club shape and put them into a binder called 'KRAKEN BACK'.
NOTE: This freebie is unfortunately not available.
Your layers should now expect similar this:
Step 28: Thunder Textures
Open the 'Grainy-and-Gritty-Vector-Texture-07.png' file along with the 'Grainy-and-Gritty-Vector-Texture-08.png' and 'Grainy-and-Gritty-Vector-Texture-17.png' files in Photoshop.
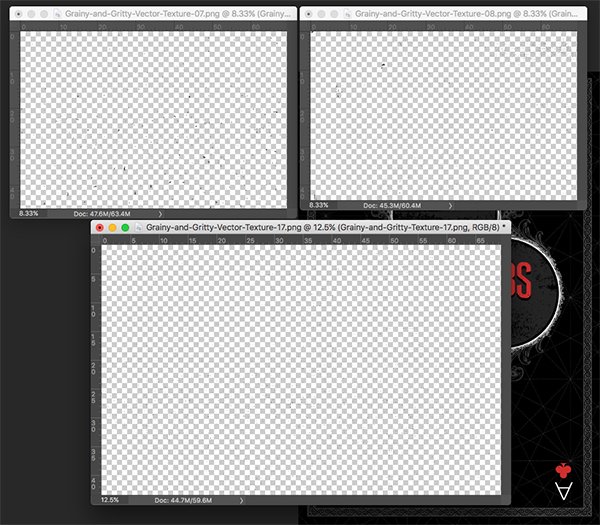
Click and elevate each of the three texture layers into your main Photoshop document and place them at the summit of your Layers Palette. Rename each of the layers and catechumen each 1 into a Smart Object and then yous end up with something like this:
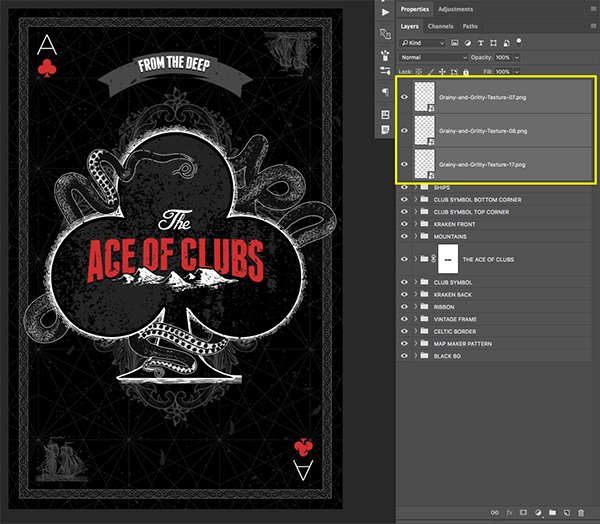
Footstep 29: True Grit
Hold the Command/Ctrl key and select all three of the texture layers before putting them into a new folder named 'THUNDER-PIXELS-CO' based on the artist who created them. Now you can get into the folder and employ a Costless Transform (Command/Ctrl+T) to each of the 3 textures in order to scale them up or downwards, rotate them, or reposition them however you like in gild to add a nice layer of grit on tiptop of our design.
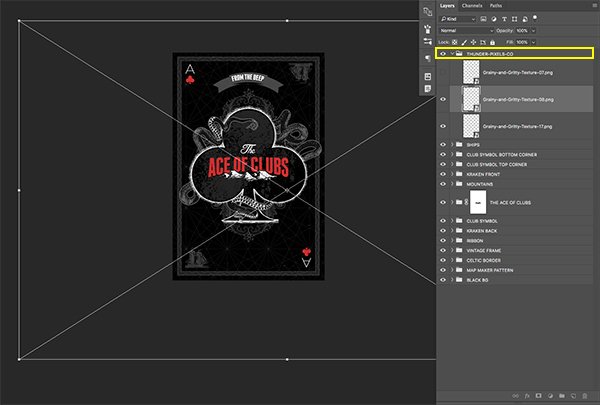
Once you are happy with the size and positioning of each of the textures, double-click on the 'THUNDER-PIXELS-CO' folder to bring up the Layer Styles for the whole group. Check off the 'Colour Overlay' option every bit shown here:
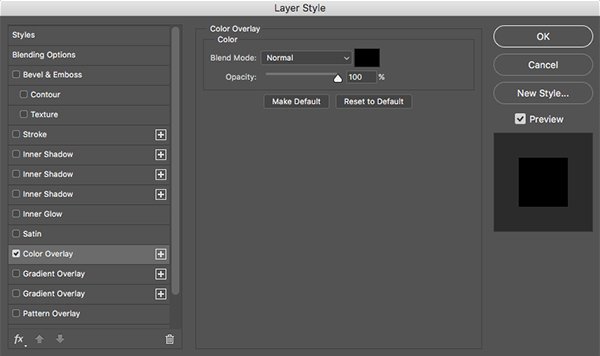
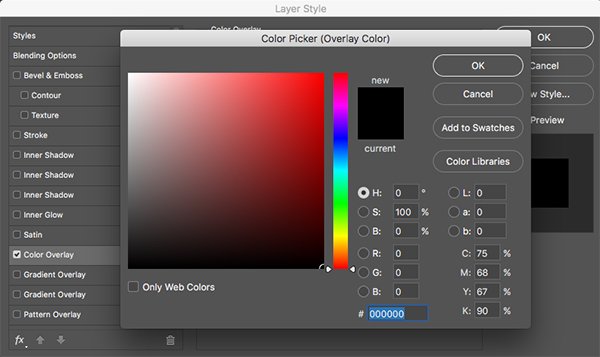
For the make full color enter a solid black (#000000) so press 'OK' twice to apply the changes and close out of both dialog boxes.
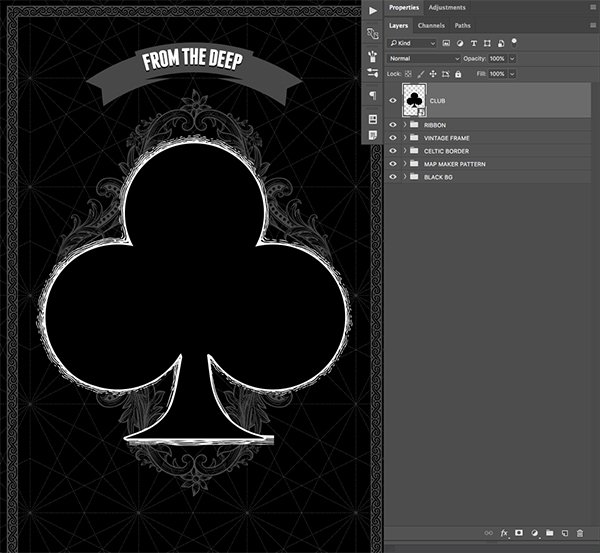
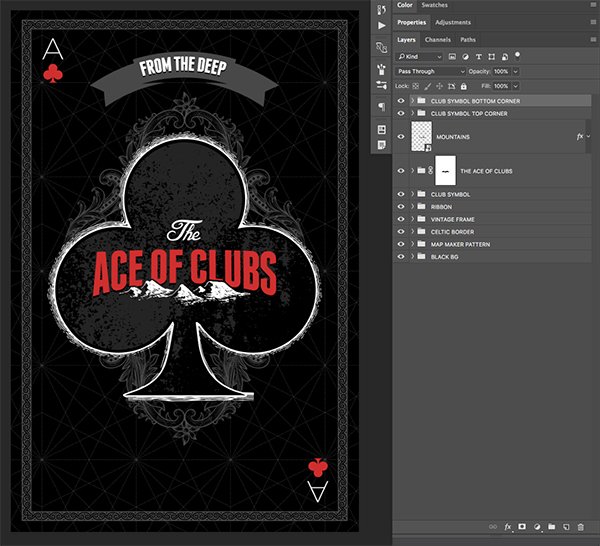
We have at present completed our 'From the Deep' playing card pattern! We take layered up a lot of different textures, patterns, and shapes forth with some customized text in order to achieve the desired result. I hope that you have enjoyed this tutorial and hopefully learned some new techniques along the manner. With so many neat vector elements to choose from, this bundle is certain to help you step up your designs and take your work to the next level. I can't look to come across what you lot guys practise with it!
Recall that whether it's your outcome for this tutorial or something new y'all've made, we'd dearest to run across your designs on our Facebook folio.
Please leave a annotate if you have any questions or suggestions. I always look frontwards to hearing from you!
There'due south however time to check out The Ultimate Vector Design Packet with tons of best-selling vector design assets based on our community's most requested items all for the toll of $29!
Source: https://www.designcuts.com/learning-hub/tutorials/design-nautical-themed-playing-card-photoshop/
Posted by: robertrathany.blogspot.com
0 Response to "How To Make Playing Cards In Photoshop"
Post a Comment